Posted on Leave a comment

Why linen rose is a meaningful gift for your beloved people?

Linen rose contains different meanings when you give it to different people. A linen rose is not a wrong choice as it combines the elegance and beauty of traditional roses with long-lasting linen fabric. In this article, we will provide you with the meaning of linen rose as a gift and how to make linen roses easily at home.

The importance of linen rose

The symbolism of linen rose

Linen rose, a captivating creation made from linen fabric under handicraft artists’ hands carries a profound symbolism that goes beyond its aesthetic appeal. Let’s dig deeper into each meaning: 

  • Strength and durability: rose is known for its strength and durability, and the linen rose symbolizes the resilience and steadfastness of a committed relationship.
  • Comfort and warmth: Linen is a fabric known for its comfort and breathability. Similarly, the linen rose symbolizes the comfort, warmth, and security that come from sharing a life with a loved one. 
  • Freshness: Linen roses seem to be associated with purity or new beginnings. They can remind you about the first time you go with her until now. Your love is refreshed and increases day by day. Moreover, the flower shows thoughtfulness and a willingness to explore new experiences together. 
  • Romantic love: Roses are associated with love and hold deep symbolic meaning in a romantic relationship. Linen rose represents passionate affection, desire, and a deep emotional connection between two individuals. 

The advantages of linen rose as a gift

As mentioned above, linen rose has such attractive appeal, along with different meanings; hence, giving linen rose to your beloved people is not a wrong decision. Let’s dig into the advantage of giving linen rose to others: 

  • Uniqueness: The linen rose is a distinctive and uncommon gift choice. It sets itself apart from traditional gifts like fresh flowers or jewelry, making it a memorable and thoughtful surprise for your spouse or the couple you are celebrating with. Its rarity adds to its value and makes it a conversation starter.
  • Environmental sustainability: As linen flowers are handmade gifts, so you’ve embraced a gentle path of environmental consciousness. By opting for this eco-friendly alternative, you’ve contributed to a greener celebration, aligning your love with the delicate balance of nature.
  • Long-lasting beauty: Unlike fresh flowers that wilt and fade over time, the linen rose lasts indefinitely. It serves as a lasting keepsake that can be displayed and cherished for years to come. Its long-lasting beauty symbolizes the enduring nature of love and serves as a reminder of the special occasion and the bond shared by the couple.
  • Allergy-friendly: You’ve picked linen rose as an allergy-friendly option out of concern for your wife’s well-being. You show delicate attention by ensuring her comfort and safeguarding her from any discomfort, deepening the compassion of your gesture. 
https://camelliabees.com/wp-content/uploads/2023/05/Linen-rose-2.jpg
Beautiful handmade linen rose

Gift ideas with linen rose for special occasions

Linen rose as a Wedding Anniversary gift

Linen/Silk is the traditional theme for the 4th wedding anniversary in many countries around the world. Giving your spouse beautiful linen roses could make her happier when it comes to commemorating the years of love and reminding commitment you have shared on this meaningful day.

You can also incorporate a linen rose with a larger gift, such as a linen-themed gift basket that includes a linen-scented candle, linen clothing, or any other gift ideas.

Linen rose as Mother’s Day gift

Presenting a linen rose to your mother on Mother’s Day symbolizes your desire to provide her with comfort and support, just as she has done for you throughout your life. It is a gesture that acknowledges the nurturing and compassionate nature of a mother’s love.

You can give the linen roses with other items that cater to her interests or hobbies, such as a book on linen history, linen napkins for the dining table, or linen clothes. 

Linen rose as a housewarming gift

Giving linen flowers to your friends or family when they move into a new home or rent a new place is not a bad decision. A housewarming gift is a perfect choice to celebrate their new home, offer best wishes, and help the house feel more like a warm place.

You can combine linen roses with linen kitchen towels, linen tablecloths, and linen throw pillows to add a touch of elegance and comfort to your friend’s new place.

https://camelliabees.com/wp-content/uploads/2023/05/Linen-rose-3.jpg

How to make linen rose at home

Camellia Bees provides you with these step-by-step instructions to help you make a beautiful linen rose yourself. It would be more meaningful when someone receives your DIY, linen rose. There is the instruction:

Preparing the materials

To make linen roses at home, you need to have these materials. You can easily buy it online such as on Amazon or Esty, or offline at a handmade store. 

  • Linen fabric (in a color of your choice)
  • Scissors
  • Floral wire or pipe cleaner
  • Floral tape
  • Hot glue gun (optional)
  • Green floral tape or ribbon (for the stem)

Step-by-step guide on making linen rose

There are how to make linen rose particularly: 

  • Step 1: Cut petals

To give the rose a more natural appearance, begin by cutting petals from linen fabric in various sizes. Shapes of petals can be teardrop or circular. 

  • Step 2: Form the petals

Roll each linen fabric petal around your finger or a pencil to create a gentle curl. This will give the petals a natural and realistic shape.

  • Step 3: Form the rose

As you add additional petals, shape and modify them to accomplish the desired shape and size. You can manipulate and distort the petals slightly to create a realistic and blossoming appearance.

  • Step 4: Create the stem

Wrapping floral tape or ribbon around the wire stem to finalize the linen rose. Begin at the rose’s base and work your way down to the end of the wire, thoroughly covering it. This will give the rose a complete and refined appearance.  

  • Step 5: Repeat and order

If desired, repeat the steps above to create additional muslin blossoms. Once you have the desired number of roses, you can present them individually or in a bouquet.

Tips and tricks for creating perfect linen rose bouquet

To make a perfect linen rose bouquet, you may need to pay attention to those things: 

  • Select high-quality linen roses
  • Choose a suitable color with the recipient’s preference
  • Add foliage and greenery
  • Arrange with care
  • Consider a vase or wrapping
https://camelliabees.com/wp-content/uploads/2023/05/Linen-rose-4.jpg
 Beautiful linen roses bouquet

There are steps on how to make linen rose easy at home. By following this guide, you can make such stunning linen roses for your special people. We hope that you find our information to be useful.  

Posted on Leave a comment

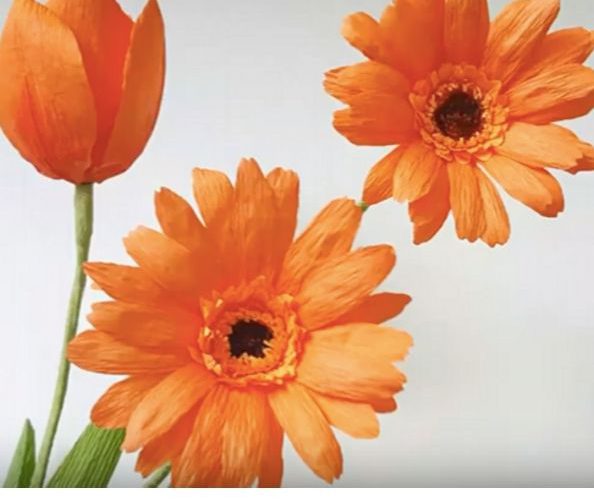
How to make paper Gerbera Daisy flower from crepe paper

Making paper Gerbera Daisy flower from crepep paper is not difficult, so today Camellia Bees will show you how to make it. Follow my step by step tutorials to make them quickly and easily.

1. Materials for making paper Gerbera Daisy flower from crepe paper

It’s important to choose high-quality crepe paper that is easy to work with. You can find crepe paper at your local craft store or online. Besides, you also need some other materials:

  • Scissors and ruler
  • Tacky Glue or Hot Glue gun
  • Floral Wires
  • Crepe paper
  • Markers

Make sure you prepare everythings that you need to make perfect paper Gerbera Daisy flower.

2. Step by step guide for making paper Gerbera Daisy flower

Let’s see how to make these easy crepe paper Gerbera Daisy flower with full stem and leaves. So easy paper DIY for all of you. Step by step tutorial for crepe paper flower making – do it yourself.

2.1. Step 1: Pistil of paper Gerbera Daisy flower:

Prepare paper samples with the following dimensions:

  • 1 pcs: 2cmx15cm
  • 2 pcs: 2.5cmx15
  • 1 pcs: 3cmx15cm
  • 1 pcs: 6cmx20cm

Let’s start making the pistil of paper Gerbera Daisy flower.

For the first paper template (2cmx15cm), use a markers to highlight the top of the paper and then cut the thread. If the stigma is not black, use a brush to finish painting after it is rolled into trunk.

In the 2nd layer of flowers, you use both of the paper samples to be a little bigger (2.5cmx15cm) and cut the petal pattern as shown in the picture.


Paste the two layers of petals you just cut into the stamens with the glue and you will complete the pistil of paper Gerbera Daisy flower.

2.2. Step 2: Petals of paper Gerbera Daisy flower

Use crepe paper with darker tones that you have prepared for the largest size (6cmx20cm) to cut petals. Then do the same and paste them into the pistil. Repeat this step to make many petals of paper Gerbera Daisy flower.

2.3. Step 3: Calyx of paper Gerbera Daisy flower

Use light green crepe paper to make sepals with the head slightly cut. The last thing is to simply paste them into the flower and you’re done.


To follow more details to step by step making paper Gerbera Daisy flower, please click and watch the video below. Hopefully, with the instructions from Camellia Bees, you can complete a beautiful paper flower to decorate or make a gift for your friends or relatives. Let’s try it !!!!

3. Tip for perfect paper Gerbera Daisy flower

When making paper flowers, it’s important to use sharp scissors to ensure clean cuts on your crepe paper. Experiment with different color combinations to create unique flowers that stand out. Remember that practice makes perfect handmade flowers, so don’t be discouraged if your first few attempts aren’t perfect.

3.1. Be gentle and use a toothpick to make paper Gerbera Daisy flower

Working with delicate crepe paper can be tricky, so be gentle to avoid tearing. If you’re having trouble shaping the petals, try using a toothpick to gently curl the edges. This can help you achieve the perfect shape and give your paper Gerbera Daisy flower more realistic look. Working with delicate crepe paper can be tricky, so be gentle to avoid tearing.

3.2. Use thin and flexible floral wire to make paper Gerbera Daisy flower

When it comes to floral wire, it’s best to use wire that is thin and flexible for easier manipulation. This will make it easier to shape your paper Gerbera Daisy flower and create the desired look.

3.3. Add Extra Details and Sparkle

Don’t be afraid to add extra details like small dots or lines with a marker or paintbrush. This can add depth and texture to your paper Gerbera Daisy flower. Consider adding a touch of glitter or metallic paint to your flowers for added sparkle and shine.

3.4. Store your paper Gerbera Daisy flower properly

Once you’ve finished your paper flowers, it’s important to store them properly to prevent damage. Store them in a dry, cool place to prevent them from getting damaged or crushed. This will help ensure that your paper Gerbera Daisy flower look beautiful for years to come.

  • Use sharp scissors to ensure clean cuts
  • Experiment with different color combinations
  • Be gentle when working with delicate crepe paper
  • Use thin and flexible floral wire
  • Add extra details like small dots or lines
  • Consider adding a touch of glitter or metallic paint
  • Store your finished flowers in a dry, cool place
  • Remember to have fun and let your creativity shine when making paper flowers.

With these tips and tricks, you’ll be able to create beautiful, unique flowers that will impress everyone who sees them.

Posted on Leave a comment

How to make simple autumn leaves from crepe paper

The autumn leaves from crepe paper is romantic and beautiful. Today Camellia Bees will show how to make simple it with some easy steps. Let’s DIY with me.

Materials for making autumn leaves

Before starting, gather all the necessary materials:

  • Crepe paper 180gsm or 140 gsm
  • White floral wire
  • Glue or Hot glue gun
  • Floral tape
  • Scissors
  • Ruler
  • Color pen

Make sure you have enough crepe paper to create multiple leaves, as well as extra in case of mistakes.

Step- by- step guide for making autumn leaves

There are many types of leaves, but in this article, Camellia Bees shows you two simple ways for beginners.

Now, let do it!!!

Type 01: Yellow autumn leaves by crepe paper

how-to-make-simple-autumn-leaf-from-crepe-paper-craft-tutorial-1

Cut a piece of yellow crepe with the size of 8.7 cm * 6cm, then cut the piece of paper into 2 triangular pieces as shown below.
how-to-make-simple-autumn-leaf-from-crepe-paper-craft-tutorial-2
Then glue the long sides of the two halves and fix them to the white floral wire. Use scissors to make the paper leaf shape.

how-to-make-simple-autumn-leaf-from-crepe-paper-craft-tutorial-3

Finally, use an orange-red pen to accentuate each autumn leaves, so you’ve completed a paper yellow autumn leaf that looks like real. It is too easy, isn’t it.

Type 02: Maple autumn leaves by crepe paper

how-to-make-simple-autumn-leaf-from-crepe-paper-craft-tutorial-4

Similar to how to make paper yellow autumn leaves above, you need to cut red crepe paper with the following size and quantity:

  • 11.0cm * 3.3cm – 1 piece
  • 9.2cm * 3.3cm –  2 pieces
  • 7.5cm * 3.3cm –  2 pieces
  • 6.0cm * 1.7cm –  2 pieces

how-to-make-simple-autumn-leaf-from-crepe-paper-craft-tutorial-5

Then cut the piece of paper into 2 triangular pieces as shown below. After that glue the long sides of the two halves and fix them to the white floral wire. Use scissors to make the paper leaf shape.

how-to-make-simple-autumn-leaf-from-crepe-paper-craft-tutorial-6

Using red floral tape to wrap the wings together symmetrically along with the largest leaf, we will complete the beautiful autumn maple leaf with crepe paper.

Tips for making perfect autumn leaves

To make the leaves look more authentic, add veins using the pencil or pen. Draw a line down the center of each leaf, then smaller lines branching off from it.

Aim for autumn leaves natural look

The veins should not be too thick or too thin – aim for a natural look. If unsure how many veins to add, take a look at real autumn leaves for inspiration

Use different colors for autumn leaves

For a more realistic effect, use different colors for the veins. A darker shade of the leaf color works well.

Don’t forget the stem of autumn leaves

Don’t forget to add a stem to each leaf. This can be a simple line or a more detailed shape, depending on the style of the drawing.

Alternative materials for stems of autumn leaves

If pipe cleaners are not available, other materials can be used to attach stems to leaves.

Some options include:

  • Floral wire
  • Thin twigs
  • Toothpicks.

However, it is important to note that these alternative materials may not provide the same level of flexibility and adjustability as pipe cleaners.

 Finally adjust the autumn leaves

After all the stems have been attached, take a moment to adjust the position and shape of the leaves as needed. This is the final step before the leaves are ready to be used in any desired craft or decoration.

To follow more details to step by step to make the paper autumn leaf. Please click and watch the video below. Hopefully, with the  instructions from Camellia Bees, you can complete a beautiful paper flower to decorate or make a gift for your friends or relatives.

If you like my instructions, don’t forget to click like, share and subscribe to my channel.

SUBSCRIBE TODAY: https://www.youtube.com/c/camelliabees?sub_confirmation=1

FIND ME ON SOCIAL MEDIA:

Instagram: https://www.instagram.com/camelliabeeshandmade/

Facebook: https://www.facebook.com/camelliabeeshandmade/

Pinterest: https://www.pinterest.com/camelliabees/

CHECK OUT MY PAPER FLOWERS SHOP ON AMAZON:

https://amzn.to/2XNHmNA

Some other easy handmade flower making guides you might like. Click on the link and see the instructions.

1. Paper Lotus Flower

2. Carnation Paper Flower

3. Paper Lily Flowers


Posted on Leave a comment

How To Make Morning Glory Flower From Crepe Paper

Today, Camellia Bees shows you how to make a morning glory flower from crepe paper. Easy way to make step by step a realistic paper morning glory flower. Take it easy to make!

 Materials for making morning glory flower

To make crepe paper morning glory flower, you will need the following materials:

  • Scissors
  • Floral Tape
  • Tacky Glue or Hot Glue gun
  • Floral Wires
  • 140gsm or 180gsm crepe paper.

All these materials are easily available at any craft store or online. Once you have all the necessary items, it’s time to get started on making your gorgeous blooms.

Step- by- steps guide for making morning glory flower

Now, let start making morning glory flower with Camellia Bees!

Step 01: Petals of paper morning glory flower

Cut 5 pieces of purple crepe paper, 5 pieces of white crepe paper with the size of 3cm * 7cm as shown below.

how-to-make-paper-morning-glory-ipomoea-flowers-from-crepe-paper-1Then paste two purple-white paper pieces on top of each other to make the petals harder.

how-to-make-paper-morning-glory-ipomoea-flowers-from-crepe-paper-2

Then cut 5 pieces of 7cm long triangle paper to make veins. Cover the finished triangle with glue and glue the wire to the center of the petal of paper morning glory.

how-to-make-paper-morning-glory-ipomoea-flowers-from-crepe-paper-3

Stick 5 petals of paper morning glory flower together.

Step 02: Trunk of paper morning glory flower

Use brown floral tap to wrap full trunk.how-to-make-paper-morning-glory-ipomoea-flowers-from-crepe-paper-4Flick the petals to create the most realistic paper flower.

Step 03: Finish paper morning glory flower

Glue them to the bottom of the flower to create leaves. And then you repeat this process with different shades of blue crepe paper to create multiple flowers. Arrange the morning glory flower in a vase or use them to decorate wreaths, garlands, or gift boxes

Tips for making perfect morning glory flower

Creating crepe paper morning glory flowers can be a fun and rewarding craft project. To make your flowers look more realistic and detailed, here are some tips:

Use different shades of blue crepe paper for morning glory flower

Using different shades of blue crepe paper can add depth and dimension to your morning glory flower. Try using a lighter shade for the center of the flower and gradually darker shades for the outer petals.

Cut slits in different widths of morning glory flower

Cutting the slits in different widths can create a more natural look for your flowers. Vary the width of the slits to make the petals look more organic and less uniform.

  • Tip: Try cutting some slits all the way to the center of the morning glory flower and others only halfway to create a more varied look.

Use green crepe paper for leaves of morning glory flower

Using green crepe paper to create leaves of varying sizes and shapes can add realism to your morning glory flower. Cut the leaves in different sizes and shapes to make them look more natural.

Add small details for morning glory flower

Adding small details like veins on the leaves or speckles on the petals with a fine-tipped marker can make your morning glory flower look more realistic. Take your time and add these details carefully for the best effect.

  • Tip: Use a light touch when adding details to avoid making your flowers look too busy or cluttered.

Curl the edges of the morning glory flower’s petals

Curling the edges of the petals slightly can give your morning glory flower a more realistic look. Use your fingers or a pencil to curl the edges of the petals outward for a natural, organic look.

Ways to decorate mornig glory flower

Centerpieces and wreaths with morning glory flower

One creative way to use handmade crepe paper morning glory flower is to create a centerpiece by arranging the flowers in a vase or jar filled with water or faux moss.

  • Another option is to make a wreath by attaching the flowers to a circular foam base using floral wire and hot glue.
  • These centerpieces and wreaths can add a pop of color and texture to any room or event.

Gift boxes and accessories with morning glory flower

Another way to incorporate these morning glory flower is to decorate gift boxes by gluing the flowers onto the lids or tying them around the box with ribbon. They can also be attached to hair clips, headbands, or brooches for a unique accessory. These flowers can add a personal touch to any gift or outfit.

Table decorations with morning glory flower

Finally, the flowers can be used as table decorations at weddings, showers, or other special events. They can be scattered on the table or arranged in a vase or jar. The morning glory flower can add a touch of elegance and whimsy to any event.

To follow more details to step by step to make the paper morning glory flower. Please click and watch the video below. Hopefully, with the above easy instructions, you can complete a beautiful paper flower to decorate or make a gift on valentine’s day craft, Mother day craft, Easter craft, Christmas decoration. Let’s try it !!!!

If you like my instructions, don’t forget to click like, share and subscribe to my channel.

SUBSCRIBE TODAY: https://www.youtube.com/c/camelliabees?sub_confirmation=1

FIND ME ON SOCIAL MEDIA:

Instagram: https://www.instagram.com/camelliabeeshandmade/

Facebook: https://www.facebook.com/camelliabeeshandmade/

Pinterest: https://www.pinterest.com/camelliabees/

CHECK OUT MY PAPER FLOWERS SHOP ON AMAZON:

https://amzn.to/2XNHmNA

Some other easy handmade flower making guides you might like. Click on the link and see the instructions.

1. Paper Lily Flower

2. Paper Gerbera Flower


Posted on Leave a comment

How to make crepe paper sunflower

Today, Camellia Bees will guide you step by step to make a paper sunflower from crepe paper. With some easy materials, you can make beautiful and useful products by yourself. 

Materials for making crepe paper sunflower

To make a crepe paper sunflower, it is important to gather all the necessary supplies and materials beforehand. You will need the following materials:

  • Crepe paper 140gsm or 180gsm (Italian Crepe paper)
  • Floral wire 16 gauge green, brown and yellow
  • Floral tape
  • Hot glue gun
  • Scissors
  • Marker pen

Once you have gathered all the necessary supplies, you can begin creating your beautiful crepe paper sunflower.

Step- by- step guide to make crepe paper sunflower

Now gather the ingredients and start doing it.

Step 1: Cutting petals of crepe paper sunflower

Cut a brown piece of crepe paper with a length of 23cm with widths of 1.7cm, 2.3cm and 3.3cm respectively. Then trimming sawtooth and roll each layer to the end.Do the same with the golden crepe paper size (3.6cm * 23cm) and paste in turn to create a complete pistil. Spread glue on the finished pistil on the finished paper sunflower base.

how-to-make-paper-sunflower-from-crepe-paper-diy-craft-tutorial-1

Step 2: Forming the petals of crepe paper sunflower

After cutting out the petals, it’s time to form them into a more realistic shape. To do this, take one petal and use a pencil to curl the edges upwards.

  • Repeat this process with all the petals until they are curled.
  • Then, fold the base of each petal slightly to create a crease.

Step 3: Assembling the petals of crepe paper sunflower

Once all the petals are formed, it’s time to assemble the crepe paper sunflower. 

  • Start by taking one petal and applying a small amount of glue to the base.
  • Then, attach it to the center of a piece of green floral wire.

how-to-make-paper-sunflower-from-crepe-paper-diy-craft-tutorial-2

Repeat this process with all the petals, spacing them out evenly around the center. Once all the petals are attached, wrap the wire with green floral tape to create the stem.

Adding the Center of crepe paper sunflower

Now that the petals are attached, it’s time to add the center of the crepe paper sunflower.

how-to-make-paper-sunflower-from-crepe-paper-diy-craft-tutorial-3

  • To do this, cut a small circle out of brown crepe paper.
  • Then, cut small slits around the edge of the circle to create a fringed effect.
  • Apply a small amount of glue to the center of the flower and attach the fringed circle.
  • Press down gently to secure it in place.

how-to-make-paper-sunflower-from-crepe-paper-diy-craft-tutorial-4

Paste the petals into the upper pistil, making sure to paste them in two alternating layers.

Step 5: Calyx of crepe paper sunflower

Cut green crepe paper sunflower with the size of 4cm * 13.5cm to make calyx shape. Paste and twist calyx into two different layers.

how-to-make-paper-sunflower-from-crepe-paper-diy-craft-tutorial-5

Connect the leaf to the stem with leaf tape and complete a realistic crepe paper sunflower to decor your home, your working corner or handmade gift maybe. So we will have a real handmade paper sunflower from crepe paper.

Tips for making wonderful crepe paper sunflower

Choosing the right petals for crepe paper sunflower

In order to make crepe paper sunflower is realistic, you should choose suitable color. If you want to have some creative flowers, you can choose different ones.

  • Choose petals that are yellow or orange in color
  • Make sure the petals are not wilted or damaged
  • Choose petals that are similar in size

Carefully cutting in each steps to make crepe paper sunflower

Cut out small green leaves from green crepe paper and attach them to the stem using floral tape

  • Use scissors to cut slits into the edges of the petals to create a fringed effect
  • Brush the edges of the petals with a darker shade of yellow to create depth and dimension 

Bringing creation on your crepe paper sunflower

  • To make your crepe paper sunflower look even more realistic, you can add some finishing touches
  • Create multiple sunflowers and arrange them together in a vase for a beautiful centerpiece
  • With these simple steps, you can easily create your own stunning crepe paper sunflower
  • Enjoy the process and let your creativity shine

Display the crepe paper sunflower

Once you’ve created your crepe paper sunflowers, there are endless ways to showcase them.

Crepe paper sunflower for decoration

  • Create a bouquet of crepe paper sunflower and display them in a vase or mason jar
  • Hang them on a wall using string or ribbon
  • Create a wreath using multiple sunflowers

Crepe paper sunflower for events

  • Use them as centerpieces for weddings or parties
  • Create a photo booth backdrop using multiple crepe paper sunflower
  • Give them as party favors or gifts

With these methods for making crepe paper sunflowers, you can create beautiful and unique decorations that will brighten up any space.

The following is a detail on how to make a paper sunflower step by step on youtube channel of Camellia Bees.

If you like my instructions, don’t forget to click like, share and subscribe to my channel.

SUBSCRIBE TODAY: https://www.youtube.com/c/camelliabees?sub_confirmation=1

FIND ME ON SOCIAL MEDIA:

Instagram: https://www.instagram.com/camelliabeeshandmade/

Facebook: https://www.facebook.com/camelliabeeshandmade/

Pinterest: https://www.pinterest.com/camelliabees/

CHECK OUT MY PAPER FLOWERS SHOP ON AMAZON: https://amzn.to/2XNHmNA

Some other easy handmade flower making guides you might like. Click on the link and see the instructions.

1. Handmade paper rose from crepe paper

2. DIY Poppy paper flowers from crepe paper

3. Lily paper flowers from crepe paper

Posted on Leave a comment

The deep messages behind handmade gifts

In a world where everything seems to be mass-produced and impersonal, handmade gifts provide a personal touch that can’t be replicated by store-bought items.

What are handmade gifts?

So handmade items can be understood as items that are handmade directly by hand. Handmade items go through many meticulous and skillful stages of the maker combined with many different materials to get a satisfactory product.

  • About materials: Handmade items are made from different materials, most of them are very simple and common, such as paper, wool, wood, fabric.
  • About quality: The quality of handmade goods depends a lot on the skill and technical level of the craftsman, the meticulousness in every detail, the quality as well as the materials to make the product.

Why are handmade gifts popular ?

the-messages-behind-handmade-gifts-1 Nowadays, the trend of favoring handmade products is so strong that, all things that are made by hand are of great interest and priority over industrial goods for sale, because:

  • Unique, highly personalized: Handmade items are often produced manually, not mass produced by industrial machines. Therefore, each item is not exactly the same, in other words, it is a unique item that no one else has
  • Cost savings: All of the above ingredients are easy to find and their prices are very cheap. Therefore, using handmade items will save you a lot more money than buying that item outside the store
  • Environmental protection: Materials for making handmade goods are diverse and abundant, you can earn from basic everyday items. Commonly used materials can be mentioned as paper, cardboard, yarn, wood…. or materials used exclusively to make handmade items such as beads, bracelets… Making handmade items is your way to make use of unused items, and recycling helps significantly reduce the amount of waste thrown into the environment.

Functions of handmade gifts

It is no coincidence that handmade gifts are loved by people of all ages. Besides beautiful, eye-catching forms, handmade gifts also bring different benefits:

Gifts for everyone

Handmade gifts are versatile handmade gifts that you can give to your friends and loved ones on any occasion, even ordinary days. Because, handmade gifts are not only limited to small and beautiful gifts such as key chains, cards but also larger valuable objects such as wooden handmade houses, crocheted teddy bears, porcelain roses, etc. Handmade gifts are quite diverse in products, designs, and models, suitable for different recipients.
A gift that takes time and meticulous effort to create will make the recipient feel so happy because he feels like a special person. They assume that the gift giver has spent enough time thinking about what they want, something that represents their personality or interests. However, if you are too busy and do not have time to make handmade items yourself, do not hesitate to contact Camellia Bees for the most thoughtful support and advice. The best quality handmade gifts will be delivered to your recipients.

the-messages-behind-handmade-gifts-2

Gifts for yourself

Giving handmade gifts to others not only makes the recipient happy but also makes yourself happier. As a writer once said: “When we give roses, our hands still have a faint scent”.
Handmade items can be given to everyone, but can also be given to yourself. Because of the variety of products, you can give yourself handmade items for souvenirs, home decoration, or embellish your desk, bookshelf. There is nothing happier than being able to decorate your home more beautifully every day.

Some recommendation about giving handmade gifts

Handmade gifts for parents

the-messages-behind-handmade-gifts-3A handmade gift for the person who was born and loved it is a very wonderful experience. Surely parents will be very happy to receive meaningful gifts from their children. Here are some gifts you can refer to:

  • Wool scarf
  • Wallet
  • Hand bag
  • Handmade rose
  • Aromatic bag

Handmade gifts for boyfriend

the-messages-behind-handmade-gifts-4Girls are often clever and love tinkering as gifts for their boyfriends. Spending time and effort to create a sincere gift is enough to show your affection for that person. Usually girls will make handmade items for their boyfriends valentine or birthday. Check out the following handmade gifts!

  • Chocolate
  • Cookie
  • Cake
  • Card
  • Double phone case

Handmade gifts for girlfriend:

the-messages-behind-handmade-gifts-5

Do guys know that girls also love to receive handmade gifts from the one they love? It is true that items such as cosmetics, clothes, and shoes are in the interest of women, but a unique handmade gift is what makes your lover more surprised:

Handmade gifts for friends:

the-messages-behind-handmade-gifts-6
Handmade gifts are also suitable for giving to a “best friend” – who always suffers, listens and stays by our side without any calculation or profit. You can give it on your birthday, Christmas, graduation, or no occasion at all. A gift as a greeting and a cute thank you for your friend:

  • Book
  • Pen
  • Dreamcatcher
  • Keychain
  • Bracelet

There are some recommendations from Camellia Bees. Need to find the perfect handmade gifts, contact Camellia Bees for support.

Posted on Leave a comment

How to make paper rose bud with crepe paper

Today, Camellia Bees shows you how to make a paper rose bud from crepe paper. Follow my step by step tutorials to make them quickly. Let’s see how to make these easy paper rose bud.

Introduction to paper rose bud crafting

Crafting paper rose bud can be a fun and relaxing activity that anyone can enjoy. Whether you’re looking for a new hobby or want to create a unique gift for someone special, making paper rose buds is an excellent way to express your creativity. Not only are paper rose buds beautiful, but they also require minimal materials and can be made at home with ease. With just a few simple steps, you can make stunning paper rose buds that will last forever. In this article, we’ll guide you through the process of creating paper rose buds from start to finish.

Materials needed for making paper rose bud

Before getting started making paper rose bud, it’s important to gather all the necessary materials. Here’s what you’ll need:

  • Crepe paper: Green and Dark Scarlet
  • Tissue
  • Glue or Hot glue gun
  • Floral tape
  • Floral wire
  • Scissors and ruler

Once you have all your materials, it’s time to get started.

Step by step guide to creating paper rose bud

Creating a paper rose bud is a fun and easy craft project that anyone can do. With just a few materials and some simple steps, you can make a beautiful paper rose bud that will last forever. Follow these steps from Camellia Bees to create your own paper rose bud:

Step 1: Stigma of paper rose bud

diy-paper-rose-bud-how-to-make-crepe-paper-flower-easy-tutorial-1

Take a piece of tissue paper prepared to wrap in floral wire to create thickness for stigma of paper rose bud.

diy-paper-rose-bud-how-to-make-crepe-paper-flower-easy-tutorial-2

Then use floral tape to continue wrapping and form the stigma, complete with a pointed tip and bigger in the ovary.

Step 2: Petals of paper rose bud

diy-paper-rose-bud-how-to-make-crepe-paper-flower-easy-tutorial-3

First, prepare the template for petal to save time with detailed sizes: 2.5cm*5cm(1inch*2inch). Then just fold the dark scarlet crepe paper and cut the template.

Next, pasting the petals together to the stamen, a tip to make your buds soft and beautiful is to stroke the last petal before pasting.

diy-paper-rose-bud-how-to-make-crepe-paper-flower-easy-tutorial-4

Use a small piece of tissue paper wrapped around the foot of the paper rose bud and past with glue. Continue wrapping with floral tape to complete this step.

Step 3: Calyx and trunk of paper rose bud

diy-paper-rose-bud-how-to-make-crepe-paper-flower-easy-tutorial-5

Cut green crepe paper according to the size: 4cm * 6cm(11/2inch*21/4 inch) then cut the calyx like the picture above.

diy-paper-rose-bud-how-to-make-crepe-paper-flower-easy-tutorial-6

Finally, cover the calyx with glue to attach to the bud, then use green crepe paper to wrap the trunk. So, you’ve completed a beautiful paper rose bud.

Tips to making paper rose bud

Making paper flowers is a fun and creative activity that can be enjoyed by people of all ages and skill levels. Whether you prefer origami, crepe paper, or tissue paper, there’s a method that will suit your needs. To make perfect paper rose buds every time, follow these tips:

  • Choose high-quality materials that are easy to work with and will hold up over time
  • Practice patience and take your time when working on each individual petal and step
  • Experiment with different colors, textures, and shapes to create unique and beautiful rose buds
  • Don’t be afraid to make mistakes – learning from your failures is an important part of the creative process

Enjoy the process! Making paper rose buds should be a fun and relaxing activity that brings joy and beauty into your life.

Some ways to decorate with paper rose bud

While your paper rose bud is beautiful on its own, you can add some extra flair by decorating it further. Here are some tips to get you started with handmade flowers:

  • Add some sparkle
  • Add glitter or sequins to the petals for some extra sparkle
  • Get Creative with Colors and Textures
  • Use watercolors to paint the petals for a unique look
  • Experiment with different colors and textures of paper to create a variety of roses
  • Create a Bouquet
  • Attach multiple paper rose buds together to create a bouquet
  • Finish with Ribbon
  • Wrap ribbon around the stem for a finishing touch

Remember, the possibilities are endless when it comes to decorating your paper rose buds. Don’t be afraid to get creative!

To follow more details to step by step to make paper rose bud flower, please click and watch the video below. Hopefully, with the above easy instructions, you can complete a beautiful paper lotus flower to decorate or make a gift for your friends or relatives. Let’s try it !!!!

Some other easy handmade flower making guides you might like. Click on the link and see the instructions.

1. Paper Lily Flowers

2. Paper sunflower

3. Paper Chamomile daisy

Posted on Leave a comment

Step-by-step guide to making paper lotus flower

Making paper lotus flowers is a fun and creative activity that can be enjoyed by people of all ages. In this step-by-step guide, we will show you how to make paper lotus flowers in just a few easy steps.

Materials to make paper lotus flower

Before getting started, it’s important to gather all the necessary materials for making paper lotus flower. Here’s what you’ll need:

  • Colored paper
  • Scissors
  • Glue stick
  • Ruler
  • Pencil

Some ways to make paper lotus flower

There are many ways to male paper lotus flower. Howerver, in this article, Camellia Bees shows 3 simple ways for beginners.

Origami Paper Folding Method for Lotus Flowers

Origami is the Japanese art of paper folding, and it is a popular technique used to make paper lotus flowers. Here’s how to do it:

Step 1: Folding the paper to shape paper lotus flower

In this first step, you need carefully fold the paper to create a standard shape:

  • Start with a square piece of paper
  • Fold the paper diagonally in half, crease well and unfold
  • Fold the paper diagonally the other way and unfold
  • Turn the paper over and fold it in half horizontally and vertically, crease well and unfold

Step 2: Forming the petals of the paper lotus flower

Next step, you create petals for paper lotus flower:

  • Bring all four corners together to meet at the centre point of the paper
  • Crease well and then unfold
  • Take each corner and fold it into the centre point again
  • Flip the paper over and repeat on the other side

Step 3: Finishing the paper lotus flower

Origami is a great way to create beautiful decorations and gifts using just paper and folding techniques.

  • Open up the petals by gently pulling them apart
  • Your paper lotus flower is complete!

Lotus flowers are a popular origami design because they are simple to make and have a beautiful, elegant shape. They can be used to decorate a room or as a thoughtful gift for a loved one.
Origami has been practiced in Japan for centuries and has become a popular art form around the world. Origami is a great way to relax and unwind, and it can be enjoyed by people of all ages and skill levels. With a little practice, anyone can create beautiful origami designs like the lotus flower.

Paper lotus flower quilling technique with paper strips

Quilling is the art of rolling and shaping thin strips of paper to create intricate designs. To make a lotus flower using quilling, start by cutting several strips of paper in different colors.

Step 1: Rolling and shaping the paper strips to make a paper lotus flower

Roll one strip into a tight coil and glue the end to secure it

step-by-step-guide-to-making-paper-lotus-flower-1

  • Take another strip and wrap it around the first coil, gluing the end to secure it
  • Continue wrapping and gluing until you have a large coil
  • Pinch one end of the coil to form a teardrop shape for the petals

step-by-step-guide-to-making-paper-lotus-flower-2

Repeat this process with smaller coils for the center of the flower.

Step 2: Cut and glue paper lotus flower

Cutting and gluing paper is an easy way to make a beautiful lotus flower.

step-by-step-guide-to-making-paper-lotus-flower-3
Here’s how to do it:

  • Draw and Cut: Start by drawing a paper lotus flower shape on a piece of paper or cardstock. After that, you cut out the flower shape and several small circles for the center
  • Fold and crease: Fold each petal in half and then fold it in half again to create creases.
  • Glue and layer: Unfold the petals and apply glue to the back of each petal and then press the petals onto the circle centers, layering them to create depth

step-by-step-guide-to-making-paper-lotus-flower-4

Step 3: Assembling the paper lotus flower

Once you have all the necessary coils, glue all the pieces together to form the lotus flower.

step-by-step-guide-to-making-paper-lotus-flower-5

  • Start by gluing the smaller coils together to form the center of the flower
  • Then, glue the larger coils around the center to form the petals
  • Make sure to arrange the petals evenly around the center

Did you know that the quilling has been around for centuries and was originally used to decorate religious objects? With a little practice, you can create beautiful paper lotus flowers and other designs using the quilling technique. Experiment with different colors and shapes to create unique and personalized designs.

3D paper lotus flower creation with templates

Creating 3D paper lotus flowers with templates can be a fun and easy project.
Here’s how to do it:

Step 1: Download and print the template of paper lotus flower

This first step is quite simple: Begin by downloading and printing a 3D paper lotus flower template. This can be found online or created from scratch.

Step 2: Cut and score template pieces of the paper lotus flower

In this step, be careful to cut pieces because it decides the beauty of the paper lotus flower

  • Using scissors, carefully cut out the template pieces
  • Then, using a scoring tool, score along the dotted lines to create fold lines.

Step 3: Fold template pieces of the paper lotus flower

Next, fold along the scored lines to create the 3D shape of the paper lotus flower

  • Be sure to fold accurately and crease the folds well.
  • Tip: Use a ruler to help create straight folds.

Step 4: Glue tabs together to create a paper lotus flower

  • Apply glue to the tabs and press them together to hold the shape in place.
  • Hold the tabs together until the glue dries to stick paper lotus flower

Step 5: Add additional layers or decorations for paper lotus flower

For added dimension and decoration, additional layers or decorations can be added to the lotus flower.
Get creative! Your 3D paper lotus flower is Complete! Once all the steps are complete, your 3D paper lotus flower is ready to be displayed or gifted.

Some tips to make the perfect paper lotus flower

Creating paper lotus flowers can be a fun and rewarding craft project. To make your handmade paper flowers stand out, try experimenting with different sizes and colors of paper. This will allow you to create unique and eye-catching flowers that are sure to impress.

Using double-sided tape to make paper lotus flower

If you’re having trouble getting the petals to stick, try using a small amount of double-sided tape instead of glue to make paper lotus flower

  • This can be especially helpful if you’re working with thinner paper that may tear easily.
  • Simply apply a small piece of tape to the back of each petal and press it firmly into place.

Embracing imperfections of the paper lotus flower

Remember, the beauty of handmade crafts is that they don’t have to be flawless. If your flower has a few small tears or creases, don’t stress about it.

  • These imperfections can make your flower look more unique and interesting.
  • Experiment with different sizes and colors of paper to create unique flowers
  • If you’re having trouble getting the petals to stick, try using a small amount of double-sided tape instead of glue.
  • Don’t worry if your flower isn’t perfect – imperfections can add character and charm!

Making paper lotus flowers is a fun and easy craft that anyone can enjoy. With just a few simple steps, you can create beautiful flowers that make great decorations or gifts.

Hope that video tutoral below helps you make paper lotus flower easly.

Posted on Leave a comment

Step-by-step guide to crafting carnation paper flower

Making carnation paper flower is an easy and inexpensive way to add some color and cheer to your life. In this article, we will explore three different methods with their own unique style: single- layer, double- layer, and crepe paper.

How to make single layer carnation paper flower

The single layer carnation paper flower is a great technique for beginners as it requires only a few materials and is very simple to execute.

step-by-step-guide-to-crafting-carnation-paper-flowers-5

Materials to make single layer carnation paper flower

Creating a single layer carnation paper flower is a delightful and rewarding project that can add a touch of elegance to any occasion or home decor. To ensure a successful crafting experience, gather the following materials before you begin:

  • Colored tissue paper
  • Scissors
  • Floral wire
  • Green floral tape

Steps to make single layer carnation paper flower

If you’d like to create a bouquet of carnations paper flower, don’t forget to follow these steps:

  • Step 1: Cut a rectangular piece of colored tissue paper approximately 6 inches by 4 inches
  • Step 2: Fold the tissue paper accordion-style, making each fold about ½ inch wide
  • Step 3: Once you have folded the entire piece of tissue paper, tie a piece of floral wire around the center of the folded paper
  • Step 4: Cut both ends of the tissue paper into a rounded shape
  • Step 5: Carefully separate each layer of tissue paper, pulling them towards the center of the flower
  • Step 6: Use green floral tape to wrap around the base of the flower, covering the floral wire
  • Step 7: Twist the floral wire to form a stem

Your single layer carnation paper flower is now complete!

Tips for creating the perfect single layer carnation paper flower

The single layer carnation paper flower is a great way to add a pop of color to any room. It is also a great way to add a personal touch to a gift or event.  Additionally, this technique can be used to create a variety of different flowers, not just carnations.

  • When creating a single layer carnation paper flower, it is important to use high-quality tissue paper to ensure that the flower looks its best.
  • Additionally, it is important to be gentle when separating the layers of tissue paper to avoid tearing.
  • Finally, you can use a thin floral wire to ensure that the stem is not too bulky

How to make double layer carnation paper flower

The double layer carnation paper flower technique adds more dimension to the flower and is slightly more advanced than the single layer technique.

step-by-step-guide-to-crafting-carnation-paper-flowers-6

Materials to make double layer carnation paper flower

With just a few materials and some patience, you can craft a double layer carnation paper flower that will brighten up any space. Here’s a list of the essential supplies you’ll need to get started:

  • Colored tissue paper
  • Scissors
  • Floral wire
  • Green floral tape

Steps to make double layer carnation paper flower

Creating a beautiful double layer carnation paper flower is a fun and rewarding project. Let do it with Camellia Bees by some steps:

  • Step 1: Cut two rectangular pieces of colored tissue paper, one approximately 6 inches by 4 inches and the other approximately 5 inches by 3 inches
  • Step 2: Fold each piece of tissue paper accordion-style, making each fold about ½ inch wide
  • Step 3: Once you have folded both pieces of tissue paper, tie a piece of floral wire around the center of the larger folded paper
  • Step 4: Cut both ends of the larger tissue paper into a rounded shape
  • Step 5: Carefully separate each layer of tissue paper, pulling them towards the center of the flower
  • Step 6: Repeat steps 3-5 with the smaller piece of tissue paper
  • Step 7: Place the smaller flower on top of the larger flower, lining up the centers
  • Step 8: Use green floral tape to wrap around the base of the flowers, covering the floral wire
  • Step 9: Twist the floral wire to form a stem
  • Step 10: Your double layer carnation paper flower is now complete!

Tips to make perfect double layer carnation paper flower

Creating a stunning double layer carnation paper flower can be a delightful addition to your home décor, gift wrapping, or even as a beautiful accessory for a special event. To ensure your paper carnations turn out flawless, follow these helpful tips:

  • Choose the right paper: The type of paper you use can greatly impact the final result of your handmade paper flower. Opt for crepe paper or tissue paper, as they are lightweight and easy to work with, allowing you to create delicate and realistic petals.
  • Use a template: To achieve a consistent shape and size for your petals, use a template. You can find various petal templates online or create your own by drawing the desired shape on a piece of cardstock and cutting it out.
  • Layering is key: To create a full and lush double layer carnation, you’ll need to layer multiple petals. Start with a smaller layer of petals for the inner layer and gradually increase the size of the petals as you you move outward. This will give your flower a natural and voluminous appearance. Aim for at least two layers of petals, but feel free to add more for an even fuller look.
  • Color and texture: To make your carnation paper flower more visually appealing, consider using different shades of the same color for the layers or adding some texture to the petals. You can achieve this by gently crumpling the paper, using a pair of scissors to create fringes, or even adding some glitter or paint for a touch of sparkle.
  • Assemble with care: When attaching the petals to the flower’s base, use a hot glue gun or strong adhesive to ensure they stay in place. Be sure to overlap the petals slightly as you attach them, working in a circular pattern to create a natural-looking bloom.
  • Finishing touches: Once your double layer carnation paper flower is assembled, take a moment to fluff and shape the petals to your liking. You can also add a stem by attaching a piece of floral wire or a wooden skewer to the base of the flower. Finish off your creation by wrapping the stem with floral tape or ribbon for a polished look.

By following these tips, you’ll be well on your way to creating a stunning double layer carnation paper flower that is sure to impress.

How to make crepe paper carnation flower

The crepe paper carnation flower is a technique that uses crepe paper instead of tissue paper to create a more realistic-looking flower.
This method is perfect for those who want to add a touch of elegance to their crafts.

step-by-step-guide-to-crafting-carnation-paper-flowers-7

Materials to make crepe paper carnation flower

Before you begin make crepe paper carnation flower, make sure you have the following items on hand:

  • Colored crepe paper
  • Scissors
  • Floral wire
  • Green floral tape

Steps to make carnation paper flower with crepe paper

The carnation paper flower from crepe paper is perfect for those who want to add a touch of elegance to their crafts.

  • Step 1: The first step is to cut a rectangular piece of colored crepe paper approximately 12 inches by 4 inches

step-by-step-guide-to-crafting-carnation-paper-flowers-1

  • Step 2: Then, fold the crepe paper accordion-style, making each fold about ½ inch wide
  • Step 3: Once you have folded the entire piece of crepe paper, tie a piece of floral wire around the center of the folded paper

step-by-step-guide-to-crafting-carnation-paper-flowers-2

  • Step 4: Next, cut both ends of the crepe paper into a rounded shape
  • Step 5: Carefully separate each layer of crepe paper, pulling them towards the center of the flower
  • Step 6: Use green floral tape to wrap around the base of the flower, covering the floral wire

step-by-step-guide-to-crafting-carnation-paper-flowers-3

  • Step 7: Twist the floral wire to form a stem

step-by-step-guide-to-crafting-carnation-paper-flowers-4

Your crepe paper carnation flower is now complete! The crepe paper carnation flower is a great alternative to tissue paper flowers.

Tips to make perfect carnation paper flower from crepe paper

Making carnation paper flowers is an easy and enjoyable craft that anyone can do.
Here are some tips to help you create perfect carnation paper flowers:

  • Be gentle when separating the layers of tissue paper or crepe paper to avoid tearing
  • Experiment with different colors and combinations to create unique flowers
  • Use sharp scissors to cut clean edges on the paper
  • Don’t be afraid to try new techniques and methods to find what works best for you

Hope that handmade tutorial videos from Camellia Bees helps you make paper carnation flowers easily.

In conclusion, making carnation paper flowers is a fun and creative way to add some color and cheer to your life. With these three methods, you’ll be able to make stunning flowers that will impress everyone who sees them. So go ahead, grab some paper and give it a try!

If you don’t have time do it by yourself, discovery handmade flower collection to choose the most suitable flowers.

Posted on Leave a comment

Celebrated gifts for happy Mother’s day

Mother’s day is a special day dedicated to celebrating the women who have raised us and supported us throughout our lives. Therefore, giving gifts for mother is popular in many countries in the world.

Meaning of Mother’s day

This is especially important when it comes to mothers. Mothers play a vital role in shaping our lives and helping us become the people we are today. By giving them gifts on Mother’s day, you are acknowledging this role and expressing your appreciation for their efforts.

celebrated-gifts-for-happy-mothers-day-1

Show appreciation for your mother on Mother’s day

It is a time to show appreciation for all that they do, from cooking meals and doing laundry to providing emotional support and guidance.
Giving gifts on Mother’s day is one way to express gratitude for these efforts.
A thoughtful gift can let your mother or maternal figure know that you recognize and appreciate everything she has done for you.
According to a survey conducted by the National Retail Federation, Americans spent an average of $220 on Mother’s day gifts in 2022. This shows that people are willing to invest in finding the perfect present for their loved ones. Some reasons why giving gifts on Mother’s Day is important include: It allows you to express your love and gratitude. By giving gifts on Mother’s day, you are honoring this role and showing your mother that you recognize and appreciate all that she has done for you. It is a way to say thank you for the countless hours spent cooking meals, doing laundry, and providing emotional support.

Strengthening your relationship with Your Mother on Mother’s day

In addition, gift-giving can help improve communication and understanding between family members. It can create opportunities for conversations and bonding experiences that might not happen otherwise. Gift-giving can create opportunities for conversations and bonding experiences that might not happen otherwise.
Personalized gifts on Mother’s day can help you reminisce about old memories and create new ones. Whatever gift you choose, remember that it’s the thought and effort that counts. Taking the time to choose a gift that is meaningful and shows your appreciation can go a long way in strengthening your bond with your mother. Taking the time to choose a gift that is meaningful and shows your appreciation can go a long way in strengthening your bond with your mother.

Create memories on Mother’s day

For example, if you take your mother on a weekend getaway for Mother’s day, you are not only giving her a fun trip but also creating memories that she will treasure forever. Similarly, if you buy her a piece of jewelry that she can wear every day, she will be reminded of your love and appreciation each time she puts it on. Gifts are not just about the present moment; they can also create lasting memories that you and your mother will cherish for years to come. When you give a thoughtful gift, you are creating an experience that will stay with her long after the gift itself has been used or consumed.

Meaningful gifts for happy Mother’s day

If you don’t know what to give your mother on Monther’s day, don’t skip this article with recommendations from Camellia Bees.

celebrated-gifts-for-happy-mothers-day-2

Gifts bring joy for happy mother’s day

Mothers are often busy taking care of others, so giving them something that brings joy is always appreciated.
Here are some celebrated gifts that will bring a smile to any mother’s face on Mother’s day:

  • A spa day: Give your mother the gift of relaxation by booking her a luxurious spa treatment. This could include a massage, facial, or pedicure.
  • Flowers: A bouquet of flowers is a classic way to brighten up your mother’s day. Choose her favorite blooms or opt for a colorful mix. That is fresh flowers or handmade flowers with material diversity, such as: paper flowers, leather flowers, linen flowers,…
    Handmade flower collection for you
  • Jewelry: Show your mother how much you appreciate her with a piece of jewelry. You could choose a necklace, bracelet, or pair of earrings that she can wear every day.
  • Books: If your mother loves reading, consider gifting her a book from her favorite author or a new release that she has been wanting to read
  • Chocolate: Treat your mother to a box of high-quality chocolates. This indulgent gift is sure to satisfy her sweet tooth.

how-to-make-dahlia-paper-flower-diy-tutorial-step-by-step

Gifts encourage Self-Care for happy Mother’s day

Mothers often put themselves last, so encouraging self-care is a great way to show them that they deserve some pampering too.
Here are some celebrated gifts on Mother’s day that promote self-care:

  • Aromatherapy diffuser: An aromatherapy diffuser can help create a relaxing and calming atmosphere in your mother’s home. It can also be used with essential oils to promote relaxation and reduce stress.
  • Yoga mat: If your mother enjoys yoga or meditation, a new yoga mat could be the perfect gift. Choose a high-quality mat that provides comfort and support during practice.
  • Candles: Candles are a great way to create a cozy and peaceful ambiance at home. Choose scents that your mother loves, such as lavender, vanilla, or citrus.
  • Bathrobe: A soft and comfortable bathrobe is a luxurious gift that your mother can use every day. Look for one made from high-quality materials, such as cotton or bamboo.
  • Tumbler: Encourage your mother to stay hydrated by giving her a stylish tumbler. This will remind her to drink water throughout the day and can be taken on-the-go.

Gifts celebrate memories for happy Mother’s day

Mothers cherish memories of their children, so giving them something that celebrates those memories is always appreciated.
Here are some celebrated gifts on Mother’s day that celebrate memories:

  • Photo album: collect all of your favorite photos of you and your mother and put them into a photo album. This is a thoughtful gift that she can look back on for years to come.
  • Customized jewelry: Consider gifting your mother a piece of customized jewelry that features your birthstone or initials. This is a sentimental gift that she can wear close to her heart.
  • Scrapbook: Create a scrapbook filled with memories of your childhood and special moments spent together. This is a creative and personalized gift that your mother will treasure.
  • Handmade cards: With this gift, you can send your feelings to your mother. The words that are difficult to speak, but it is more emotional with writing words.
  • Family tree: Put together a family tree that includes photos and information about your ancestors. This is a unique and meaningful gift that celebrates your family’s history.
  • Personalized art: Commission a piece of personalized art that features your family or something special to your mother. This is a one-of-a-kind gift that she will love.

celebrated-gifts-for-happy-mothers-day-3

Gifts promote wellness for happy Mother’s day

Mothers often prioritize the health and wellness of their families, so giving them something that promotes their own wellness is a great way to show appreciation.
Here are some celebrated gifts on Mother’s day that promote wellness:

  • Air purifier: An air purifier can help improve indoor air quality and reduce allergens in the home. This is a practical gift that promotes better respiratory health.
  • Vitamix blender: A high-powered blender like the Vitamix can be used to create healthy smoothies and soups. This is a useful gift for mothers who enjoy cooking and eating healthy foods.
  • Fitbit: Encourage your mother to stay active by giving her a Fitbit. This wearable device tracks steps, heart rate, and other fitness metrics to promote a healthier lifestyle.
  • Healthy cookbook: If your mother loves cooking, consider gifting her a healthy cookbook filled with nutritious recipes. This is a thoughtful gift that promotes healthy eating habits.
  • Meditation app subscription: Give your mother the gift of mindfulness with a subscription to a meditation app. This is a simple yet effective way to reduce stress and promote relaxation.

Gifts support local businesses for happy Mother’s day

Supporting local businesses is always a good idea, especially during challenging times.
Here are some celebrated gifts on Mother’s day that support local businesses:

  • Artisanal soap set: Many small businesses offer handmade soap sets made from natural ingredients. These make great gifts that support local artisans.
  • Local wine or beer: Consider gifting your mother a bottle of wine or beer from a local vineyard or brewery. This is a unique and thoughtful gift that supports local businesses.
  • Handmade pottery: Local potters often create beautiful handmade pieces, such as mugs, vases, and bowls. These make great gifts that support local artists.
  • Craftsman-made jewelry: Many small jewelers create one-of-a-kind pieces using traditional techniques. These make great gifts that support local craftsmen.
  • Gourmet food basket: Look for local specialty stores that offer gourmet food baskets filled with artisanal cheeses, meats, and other treats. This is a delicious gift that supports local businesses.

Mother’s day is an opportunity to show your mother how much you appreciate her love and care. By choosing a celebrated gift that brings joy, encourages self-care, celebrates memories, promotes wellness, or supports local businesses, you can make this day extra special. Remember, it’s the thought that counts, so choose something that comes from the heart.


Posted on Leave a comment

How to make Rainbow Rose from crepe paper

Camellia Bees will show you how to make the crepe paper Rainbow rose flower. Follow my step by step tutorials to make them quickly. Let’s see how to make these easy crepe paper . So easy paper DIY for all of you.

Materials for making Rainbow Rose from crepe paper

Making a Rainbow Rose from crepe paper is an easy and fun craft that anyone can do. Before beginning, it’s important to gather all the necessary supplies. Here are the items needed:

  • Scissors
  • Tissue
  • Floral Tape
  • Tacky Glue or Hot Glue gun
  • Floral Wires
  • Crepe paper: Green and 8 your favorite colors to make rainbow rose flower

These materials can be found at any craft store or online.

Step by step guide for making Rainbow Rose from crepe paper

Once you have everything, it’s time to start creating your beautiful Rainbow Rose. Screw it, let do it!

Step 1: Make templates for petals of crepe paper rainbow rose art craft.

how-to-make-rainbow-rose-crepe-paper-flower-diy-super-easy-way-tutorial-1

To save time, you fold the paper and cut the petals to a specific pattern and size:

1 1/2 inch*3 inch

Step 2: Connect the petals to form a beautiful rainbow rose flower

how-to-make-rainbow-rose-crepe-paper-flower-diy-super-easy-way-tutorial-2

Wrap tissue into the trunk then wrap with floral tape to form a bud. At the first petals on the bud, you stick the petals to hold the bud tightly.

how-to-make-rainbow-rose-crepe-paper-flower-diy-super-easy-way-tutorial-3
After the first petal, you will paste the next petal normally with the opening at the top. Remember to trick the petals so they become softer.

Your flower is not finished yet, but you need to use floral tape to wrap it in the calyx position.

how-to-make-rainbow-rose-crepe-paper-flower-diy-super-easy-way-tutorial-4

Cut a little at the base of the petal then paste them in a funnel shape to create a flurry of outermost petals.

Step 3: Calyx and leave of rainbow rose flower

how-to-make-rainbow-rose-crepe-paper-flower-diy-super-easy-way-tutorial-5

Similar to other posts, cut the calyx and gently stroke it.

Similar to other posts, cut the calyx and gently stroke it. Use crepe green paper to wrap sepals to the end of the flower.

how-to-make-rainbow-rose-crepe-paper-flower-diy-super-easy-way-tutorial-6

Cut the leaf pattern as shown above, then fold gently along the middle of the leaf and apply floral wire to finish.

To follow more details to step by step to make paper Rainbow Rose flower. Please click and watch the video below from Camellia Bees. Hopefully, with the above easy instructions, you can complete a beautiful paper flower to decorate or make a gift for your friends or relatives. Let’s try it !!!!

3. Display Rainbow Rose

Congratulations! You’ve now made a beautiful Rainbow Rose from crepe paper. To display it, place it in a vase or tie a ribbon around the stem and hang it up. If you want to preserve your rose, there are a few things you can do.

  • First, spray it with hairspray to help prevent the colors from fading.
  • Second, store it in a cool, dry place away from direct sunlight.
  • Finally, consider placing it in a shadow box or frame to protect it from damage.

In conclusion, making a Rainbow Rose from crepe paper is a fun and easy craft that anyone can enjoy. With just a few supplies and some creativity, you can create a beautiful and unique decoration for your home or office. So go ahead and give it a try – you won’t be disappointed!

If you like my instructions, don’t forget to click like, share and subscribe to my channel.

SUBSCRIBE TODAY: https://www.youtube.com/c/camelliabees?sub_confirmation=1

FIND ME ON SOCIAL MEDIA:

Instagram: https://www.instagram.com/camelliabeeshandmade/

Facebook: https://www.facebook.com/camelliabeeshandmade/

Pinterest: https://www.pinterest.com/camelliabees/

CHECK OUT MY PAPER FLOWERS SHOP ON AMAZON:

https://amzn.to/2XNHmNA

Some other easy handmade flower making guides you might like. Click on the link and see the instructions.

1. Paper Lotus Flower

2. Carnation Paper Flower

3. Paper Lily Flowers

Posted on Leave a comment

How to make Eyeball paper flowers for Halloween

Camellia Bees will show you how to make Eyeball paper flowers. Let’s see how to make these easy Eyeball paper flowers for Halloween decoration. So easy paper DIY for all of you. Step by step tutorial for crepe paper flower making.

Materials for making Eyeball paper flowers for Halloween

To create Eyeball paper flowers for Halloween, you will need the following materials:

  • Scissors
  • Floral Tape (Green or Light Green)
  • Tacky Glue or Hot Glue gun
  • Floral Wires
  • Black crepe paper
  • Water color

These materials can easily be found at your local craft store or online. Once you have gathered all necessary items, it’s time to get started on making your spooky decorations! Now, let’s DIY eyeball paper flowers with Camellia Bees!

Step by step guide to make Eyeball paper flowers

Creating paper flowers is a fun and easy craft that can be enjoyed by people of all ages. Follow these simple instructions to make your own eyeball paper flowers.

Step 01: Eye of Eyeball paper flowers for Halloween

how-to-make-eyeball-paper-flowers-for-halloween-decoration-from-crepe-paper-1

Cut a piece of plastic with a diameter of 2 cm by the diameter of the petal, then paste it on the prepared sponge bud. Then cut a small piece of black crepe paper to make the eyeballs of the paper flower.

Step 02: Pistil of Eyeball paper flowers for Halloween

how-to-make-eyeball-paper-flowers-for-halloween-decoration-from-crepe-paper-2

Cut crepe paper size 5.5 cm * 25 cm, fold in 4 and then cut into fibers to make pistil. Use your fingers to gently twist the pistil of eyeball paper flowers.

Use glue gun to glue the finished fringe into the completed eyeball.

Step 03: Petals of eyeball paper flowers for Halloween

There are 3 types of petals in the design of this eyeball flower design. Please pay attention, they will be the same size 4 cm * 5 cm but cut into 3 shapes below:

  • Heart-shaped petals
  • Oval petals
  • 3-petal petals

how-to-make-eyeball-paper-flowers-for-halloween-decoration-from-crepe-paper-3

Gentle drag to shape the petals, then paste them into the trunk. Flower layer in heart shape, 3 pyramid shape inside, flower layer in oval shape outside.

Step 04: Calyx of Eyeball paper flower for Halloween

how-to-make-eyeball-paper-flowers-for-halloween-decoration-from-crepe-paper-4

This part is very familiar to you guys. You only need to fold a piece of crepe paper into 4 and cut in the picture below.

Lastly, just paste the sepals onto the newly completed petal to finish a tasteful decoration for this Halloween season.

To follow more details to step by step making Eyeball paper flower for Halloween, please click and watch the video below. Hopefully, with the above easy instructions, you can complete a beautiful paper flower to decorate on Hallowen season. Let’s try it !!!!

Tips for perfect Eyeball paper flowers for Halloween

These flowers can be used as decorations for Halloween parties or as a fun craft activity for kids. Therefore, if this is the first time you make it, don’t worry. Camellia Bees give you some tips:

  • Creating Realistic Eyes: To create a more realistic eye, use different shades of red tissue paper for the veins.
  • Experimenting with Sizes and Shapes: Experiment with different sizes and shapes of white tissue paper to create unique flowers. By using different sizes and shapes of tissue paper, you can create a variety of flowers that look like they came from different types of eyes.
  • Using a Hot Glue Gun: Use a hot glue gun instead of a glue stick for a stronger hold. A hot glue gun will ensure that your flowers stay together and don’t fall apart.
  • Adding Extra Spooky Touches: Spray your finished eyeball paper flowers with glitter or glow-in-the-dark spray paint for an extra spooky touch. Adding glitter or glow-in-the-dark spray paint will make your flowers stand out and add an extra spooky touch to your decorations.

If you like my instructions, don’t forget to click like, share and subscribe to my channel.

SUBSCRIBE TODAY: https://www.youtube.com/c/camelliabees?sub_confirmation=1

FIND ME ON SOCIAL MEDIA:

Instagram: https://www.instagram.com/camelliabeeshandmade/

Facebook: https://www.facebook.com/camelliabeeshandmade/

Pinterest: https://www.pinterest.com/camelliabees/

CHECK OUT MY PAPER FLOWERS SHOP ON AMAZON:

https://amzn.to/2XNHmNA

Some other easy handmade flower making guides you might like. Click on the link and see the instructions.

Pinterest: https://www.pinterest.com/camelliabees/

CHECK OUT MY PAPER FLOWERS SHOP ON AMAZON:

https://amzn.to/2XNHmNA

Some other easy handmade flower making guides you might like. Click on the link and see the instructions.

1. Paper Myosotis scorpioides Flower

2. Paper Marigold Flower

3. Paper Dahlia Flower

Posted on Leave a comment

How to make paper Marigold flowers from crepe paper

Welcome to a handmade flower’s blog – Camellia Bees. I will show you how to make paper Marigold flower. Follow my step by step tutorials to make them quickly.

Flowers are a beautiful way to express emotions and bring life into any space. Marigold flowers, in particular, have been used for centuries as decorations during festivals and celebrations. Let’s see how to make these easy crepe paper Marigold flower with full stem and leaves. So easy paper DIY for all of you. step by step tutorial for crepe paper flower making – do it yourself.

how-to-make-paper-marigold-flower-from-crepe-paper-diy-step-by-step-1

Materials for making paper Marigold flowers from crepe paper

With some basic materials and a little bit of patience,  you can create beautiful paper Marigold flowers that will brighten up your home or event. To create your own paper Marigold flowers, you will need the following supplies:

  • Scissors and ruler
  • Floral Tape
  • Tacky Glue or Hot Glue gun
  • Floral Wires
  • Crepe paper
  • Markers

Step by step guide for making paper Marigold flowers from crepe paper

Now, let’s DIY paper Marigold flower with Camellia Bees!

Step 1: Stigma of paper Marigold flowers

how-to-make-paper-marigold-flower-from-crepe-paper-diy-step-by-step-2

Cut fringed crepe paper and wrap it in the trunk with a hot glue gun to make the Marigold pistil

Step 2: Petals of paper Marigold flowers

how-to-make-paper-marigold-flower-from-crepe-paper-diy-step-by-step-3

Fold the paper and the petals with the middle part behind, just cut at the top to form a connected strip of petals.


how-to-make-paper-marigold-flower-from-crepe-paper-diy-step-by-step-4

Put the floral wire into the middle of the petal-shaped paper strip with the glue covered. Put the petals on one side, then wrap in the stamens.

This way you will save a lot of time to complete a solid flower with lots of petals easily.

Step 3: Calyx of paper Marigold flowers

how-to-make-paper-marigold-flower-from-crepe-paper-diy-step-by-step-5

Finally, use floral tape to wrap sepals and continue wrapping to the end of the trunk.

To follow more details to step by step making paper Marigold flowers, please click and watch the video below. Hopefully, with the above easy instructions, you can complete a beautiful paper flower to decorate or make a gift for your friends or relatives. Let’s try it !!!!

Tips for displaying paper Marigold flowers

Making paper Marigold flowers from crepe paper is a fun and easy craft that anyone can enjoy. Once you’ve created your beautiful flowers, here are some tips for displaying them:

  • Arrange them in a vase or jar filled with sand or rocks to keep them upright
  • Create a garland by stringing several flowers together on a length of ribbon or twine
  • Attach them to a wreath or other decorative item for a pop of color
  • Use them as table decorations at weddings or other events

Remember to experiment with different colors and sizes to create unique and personalized flowers. With a little bit of creativity and patience, you can create stunning paper Marigold flowers that will last much longer than fresh ones.

Posted on Leave a comment

How to make paper Artichoke flowers from crepe paper

Today, Camellia Bees will show you how to make paper Artichoke flowers. Follow my step by step tutorials to finish them quickly. Let’s see how to make these easy paper Artichoke flowers.

Materials for making paper Artichoke flowers from crepe paper

To create beautiful paper Artichoke flowers, you will need the following materials:

  • Scissors
  • Floral Tape (Green or Light Green)
  • Tacky Glue or Hot Glue gun
  • Floral Wires
  • Crepe paper
  • Tissue paper
  • Color pen

Step by step guide for making paper Artichoke flowers from crepe paper

Creating paper Artichoke flowers is an easy and enjoyable craft activity that anyone can do. Follow these simple steps to make your own stunning paper artichoke flowers from crepe paper. Now, let’s DIY paper Artichoke flowers with Camellia Bees!

 Step 01: Stem and flower base of paper Artichoke flowers

how-to-make-paper-artichoke-flowers-from-crepe-paper-diy-tutorial-1

Take a 6-inch A4-sized paper and wrap it into a cylinder.

Then grab a tissue paper wrapped in several layers of circles on the top of the trunk. Continue to use tightly wrapped yellow floral tape to fix the base of paper Artichoke flowers as shown.

Step 02: Pistil and petals of paper Artichoke flowers

how-to-make-paper-artichoke-flowers-from-crepe-paper-diy-tutorial-2

Prepare 8 pieces of purple crepe paper with size 3 cm * 25 cm. Continue trimming them into a filament.

how-to-make-paper-artichoke-flowers-from-crepe-paper-diy-tutorial-3

Use a glue gun to roll these 4 layers of paper together to make flower buds, then glue onto the finished flower base.

Continue wrapping 4 more layers of crepe paper until the end of the paper Artichoke flowers. Use scissors to trim the excess petals.

Step 03: Leaves of paper Artichoke flowers

how-to-make-paper-artichoke-flowers-from-crepe-paper-diy-tutorial-4

Cut about 50-60 pieces of paper-shaped crepe paper with the size of 2.5 * 3.5 cm. Use a small yellow pen to lightly stroke the edge of the leaf. Then paste them into layers alternately on the sepals to help the artichoke flower look the most realistic.

how-to-make-paper-artichoke-flowers-from-crepe-paper-diy-tutorial-5

To follow more details to step by step making paper Artichoke flowers, please click and watch the video below. Hopefully, with the above easy instructions, you can complete a beautiful paper flower to decorate your room. Let’s try it !!!!

Tips for making perfect paper Artichoke flowers

When making paper Artichoke flowers, it’s important to keep a few tips and tricks in mind to ensure that your flowers turn out beautifully.

Choosing the right paper to make paper Artichoke flowers

One of the most important factors in creating realistic and sturdy paper artichoke flowers is using high-quality crepe paper. This will ensure that your handmade flowers hold their shape well and look as realistic as possible.

Size matters to make paper Artichoke flowers

If you want to create a larger flower, it’s important to use a larger Styrofoam ball and more crepe paper strips. This will help your flower look more proportional and full.

Get creative with colors to make paper Artichoke flowers

Don’t be afraid to experiment with different colors of crepe paper to create unique and colorful paper Artichoke flowers. This is a great way to add a personal touch to your paper artichokes. Vary the length and width of the fringed strips when wrapping them around the Styrofoam ball to give your flowers a more natural look.

Keep glue to a minimum to make paper Artichoke flowers

When using a glue gun to assemble your paper Artichoke flowers, it’s important to use it sparingly to avoid any unsightly glue marks on your finished flowers.

A little bit of glue goes a long way!

If you like my instructions, don’t forget to click like, share and subscribe to my channel.

SUBSCRIBE TODAY: https://www.youtube.com/c/camelliabees?sub_confirmation=1

FIND ME ON SOCIAL MEDIA:

Instagram: https://www.instagram.com/camelliabeeshandmade/

Facebook: https://www.facebook.com/camelliabeeshandmade/

Pinterest: https://www.pinterest.com/camelliabees/

CHECK OUT MY PAPER FLOWERS SHOP ON AMAZON:

https://amzn.to/2XNHmNA

Some other easy handmade flower making guides you might like. Click on the link and see the instructions.

Pinterest: https://www.pinterest.com/camelliabees/

CHECK OUT MY PAPER FLOWERS SHOP ON AMAZON:

https://amzn.to/2XNHmNA

Some other easy handmade flower making guides you might like. Click on the link and see the instructions.

1. Paper Myosotis scorpioides Flower

2. Paper Marigold Flower

3. Paper Dahlia Flower

Posted on Leave a comment

How To Make Paper Ranunculus Flower From Crepe Paper

Today, Camellia Bees shows you how to make a paper Ranunculus flower small size from crepe paper. It looks complicated but you only need to follow my step-by-step guide to make the most beautiful paper Ranunculus flower. So easy paper DIY for all of you.

Materials to make paper Ranunculus flowers from crepe paper

Before starting the process of making paper Ranunculus flower, you just need to prepare the simple materials as below:

  • Crepe paper
  • Coton Ball
  • Glue or Hot glue gun
  • Floral tape
  • Scissors
  • Ruler

Step by step guide to make paper Ranunculus flowers

Creating paper Ranunculus flowers is a fun and easy craft project that can be done with just a few materials. Follow these simple steps to make your own beautiful paper flowers.

Step 1: Preparing template of paper Ranunculus flowers

First, prepare the template for each type of petal to save time with detailed sizes of each type sbelow. Then just fold the blue crepe paper and cut the template to be:

  • 16 Center petals: 2cm x 1cm
  • 16 Outer petals: 2cm x 1.5cm
  • 20 Full petals: 2.2cm x 2cm

how-to-make-paper-ranunculus-flower-from-crepe-paper-ii-small-size-diy-1

Besides, you need to cut a round piece of paper with darker tones to paste on cotton ball.

how-to-make-paper-ranunculus-flower-from-crepe-paper-ii-small-size-diy-7

In the center layer, you use the smallest petals stuck to each other onto the coton ball clockwise. In this first layer of flowers, paste the entire petal.

Step 2: Making template of paper Ranunculus flower

In the second layer of flowers, continue to paste the same as the first layer of flowers, but only partially glue the petals and continue to paste.

Continue to do the same with the last floral layer. In the outermost petals you use your arms to stretch to create the inflection of the petals.

Use a brush to paint the top of the petals to create the characteristic of Ranunculus flower.

Step 3: Calyx of paper Ranunculus flower

Fold the green crepe paper to cut the sepals with the tip to make the sepals. Then paste with hot glue gun that you have completed the beauty Paper Ranunculus flower.

To follow more details to step by step to make paper Ranunculus flower please click and watch the video below. Hopefully, with the above easy instructions, you can complete a beautiful paper flower to decorate or make a gift for your friends or relatives. Let’s try it !!!!

Tips and Tricks for Making Perfect Paper Ranunculus Flower

Making paper ranunculus flowers can be a bit tricky at first, but with some practice, you’ll soon become an expert. Here are some tips and tricks to help you create perfect paper ranunculus flowers:

Use different shades of crepe paper to make paper Ranunculus flowers

Using different shades of crepe paper can create a more realistic effect for your paper ranunculus flowers. This can add depth and dimension to your flowers, making them look more like the real thing.

Stretch the petals lengthwise before make paper Ranunculus flowers

Stretching the petals lengthwise can give them a more natural curve, making them look more like real ranunculus flowers.

  • This can be done by gently pulling the edges of the petals in opposite directions.
  • Stretching the petals lengthwise can give them a more natural curve.

Be patient when attaching petals to create paper Ranunculus flowers

When attaching the petals to the center of the flower, take your time to ensure they are positioned correctly. This can be a delicate process, but it’s important to be patient to achieve the desired effect.

Experiment with different sizes and shapes of p etals when you make paper Ranunculus flowers

Experimenting with different sizes and shapes of petals can create unique-looking flowers.

  • This can add variety to your paper ranunculus bouquet and make it more interesting to look at.
  • Experimenting with different sizes and shapes of petals can create unique-looking flowers.

Use a ruler to ensure consistency between paper Ranunculus flowers

Using a ruler to ensure that all your petals are the same size can help create a more uniform and professional-looking paper ranunculus flower. This can be especially helpful if you’re making multiple flowers for a bouquet.

Have Fun and Be Creative. Most importantly, have fun and be creative! Making paper ranunculus flowers can be a relaxing and enjoyable activity, so don’t be afraid to experiment and try new things.

Posted on Leave a comment

How to make paper Gladiolus flowers from crepe paper

Today, Camellia Bees will show you how to make paper Gladiolus flowers. Follow my step by step tutorials to finish them quickly. Let’s see how to make these easy paper Gladiolus flowers. So easy paper DIY for all of you. Step by step tutorial for crepe paper flower making – do it yourself.

Materials and tools to make paper Gladiolus flowers from crepe paper

These paper flowers are made from crepe paper which is lightweight and easy to work with. The best part about making these paper Gladiolus flowers is that they require minimal materials and can be made in the comfort of your own home. So, what you will need:

  • Scissors
  • Floral Tape (Yellow)
  • Tacky Glue or Hot Glue gun
  • Floral Wires
  • Crepe paper
  • Tissue paper
  • Color crayon

Steps to make paper Gladiolus flowers from crepe paper

Like any craft, creating crepe paper flowers takes practice. Don’t be discouraged if your first few attempts aren’t perfect. Keep practicing and experimenting until you find the techniques that work best for you.

Now, let’s DIY paper Gladiolus flowers with Camellia Bees!

Step 01: Stem of paper Gladiolus flowers

how-to-make-paper-gladiolus-flowers-from-crepe-paper-diy-tutorial

Wrap the yellow tape into a piece of wire about 50cm long to make the stem of the Gladiolus flower. Then use wire to wrap along the trunk to create thickness and stiffness for the trunk.

Step 02: Leaves of paper Gladiolus flowers

how-to-make-paper-gladiolus-flowers-from-crepe-paper-diy-tutorial-2

Cut green crepe paper with 2 sizes below:

  • 13 cm * 5 cm: 4 pieces of small leaf
  • 17 cm * 5 cm: 4 pieces of big leaf

Then fold the piece of paper in half and bevel one end of the leaf to make the shape shown below. Use a yellow crayon to paint the edge of the leaf to make it more realistic.

how-to-make-paper-gladiolus-flowers-from-crepe-paper-diy-tutorial-3

After that, attach the stem to the center of the leaf and fold it in half. Continue to do the same for the next 2 layers of paper Gladiolus flower.

Step 03: Flower of paper Gladious flowers

Cut 5cm * 6 cm pink crepe paper to make petals. Here we will have 2 types of small and large flowers in different ways. You just need to follow the step by step guide of camelliabee.com.

  • Small paper Gladiolus flowers :

how-to-make-paper-gladiolus-flowers-from-crepe-paper-diy-tutorial-4

You fold the crepe paper in half, then cut the top of the paper in a heart shape. Then open and twist the pattern to form petals. Do the same with the other piece of paper, then glue the two petals together. Finally, paste directly into the interstitial part of the leaf of paper Gladiolus flower.

  • Big paper Gladiolus flowers

how-to-make-paper-gladiolus-flowers-from-crepe-paper-diy-tutorial-5

You cut 6 samples of pink crepe paper with the same size as above, then cut the piece of paper in half into two triangles and then attach two long edges to the wire. Then use scissors to shape the petals. How to do paper Gladiolus flower the same as making orchid you can refer here.

how-to-make-paper-gladiolus-flowers-from-crepe-paper-diy-tutorial-6

Use yellow tape to wrap the petals together, then stick them directly onto the body. Continue to paste leaves and flowers alternating to create a complete paper Gladiolus flower.

Benefits of making paper Gladiolus flowers with crepe paper

Making paper gladiolus flowers has many benefits, including:

Making paper Gladiolus flowers from crepe paper is cost-effective and customizable

One of the best benefits of making paper Gladiolus flower is chepaer than available paper flower:

  • Cost-effective: Real flowers can be expensive, especially if you need a large quantity. Making your own paper flowers is a much more affordable option.
  • Customizable: With paper flowers, you can choose the colors and sizes that best fit your needs. You can even mix and match different types of flowers for a unique look.

Making paper Gladiolus flowers from crepe paper is durable and sustainable

Making paper flowers is a great way to save money while still having beautiful decorations for any occasion.

  • Durable: Paper flowers are much more durable than real flowers.
    They won’t wilt or die and can be used over and over again.
  • Sustainable: Making paper flowers is an eco-friendly alternative to buying real flowers which often have a large carbon footprint due to transportation and production methods.

Making paper Gladiolus flowers from crepe paper is easy and versatile

Making paper gladiolus flowers from crepe paper is a fun and easy DIY project that anyone can do.

  • Easy to Make: Making paper flowers is a simple and fun craft that anyone can do with a little practice.
  • Versatile: Paper flowers can be used for a variety of purposes, such as home decor, wedding decorations, and even as a gift.

Paper flowers are perfect for those who want to add a personal touch to their decorations.

With just a few materials and some patience, you can create beautiful and realistic-looking flowers that will last for years to come. Whether you’re looking to decorate your home or add a personal touch to a special occasion, paper flowers are a great choice.

So why not give it a try?

To follow more details to step by step making paper Gladiolus flower, please click and watch the video below. Hopefully, with the above easy instructions, you can complete a beautiful paper flower to decorate your room. Let’s try it !!!!


Posted on Leave a comment

How to use floral tap with Succulents

This post is quite special compared to the posts in my collection. Today, Camellia Bees will show you how to use Floral tape with succulents. Let’s see how to make these method of using floral tape with succulents. So easy paper DIY for all of you. 

Material and tool for using floral tap with Succulents

What you will need:

  • Scissors
  • Floral Tape
  • Floral Wires
  • Succulents

Steps to use floral tap with Succulents

Now, let’s DIY how to use floral tape with succulents with Camellia Bees!

Succulents are very easy to live, do not require constant care, meaning a strong, lasting, eternal love. Plants are ideal for display on a desk, balcony or kitchen.

First, I’ll show you everything I have to guide you in detail

how-to-use-floral-tape-with-succulents-diy-step-by-step-easy-making-1

Next, create a long stem for the succulents

how-to-use-floral-tape-with-succulents-diy-step-by-step-easy-making-2

The succulents are usually very short, sometimes you have to remove the leaves to get a small trunk.

Use a floral wire across the body of the succulents and bend perpendicular to add rigidity of the body, using the floral wire head to pierce directly into the body.

Finally, wrap floral tape on succulents.

how-to-use-floral-tape-with-succulents-diy-step-by-step-easy-making-3
Use floral tape to interleave between floral wires to get a firm grip, wrapping from the top to the bottom of the succulents.

how-to-use-floral-tape-with-succulents-diy-step-by-step-easy-making-4

Try plugging the flowers into a small decorative pot on the desk. Just looking at the small tree shape but full of solid vitality, toughness, all tiredness, sorrow, stress also gradually dissipates, helping us to have more confidence, eager to live and work.

To follow more details to step by step how to use floral tape with succulents, please click and watch the handmade tutotial video below. Hopefully, with the above easy instructions, you can complete a beautiful paper flower to decorate or make a gift for your friends or relatives. Let’s try it !!!!

If you like my instructions, don’t forget to click like, share and subscribe to my channel.


Posted on Leave a comment

How to make Dahlia paper flower

Making paper flowers is a fun and creative way to decorate your home or add a unique touch to gifts. One of the most beautiful and popular paper flowers is the dahlia. With its vibrant colors and intricate petals, it’s no wonder why so many people love making them. In this article, I’ll be sharing my personal experience on how to make a stunning Dahlia paper flower.

1. Materials and Tools Needed for Dahlia paper flower

1.1. Materials

You can find these supplies at any craft store or online retailer. Make sure to choose tissue paper in your desired color scheme, as well as floral wire that is sturdy enough to hold the weight of the flower:

  • Colored tissue paper (at least 8 sheets)
  • Floral wire
  • Green floral tape
  • Scissors

1.2. Tools

Same as making Calla Lily, with Dahlia paper flower, there are some necessary tools, including:

  • Ruler
  • Pencil

2. Step by step guide on making a Dahlia paper flower

As someone who loves crafting, making paper flowers has always been one of my favorite activities. Today, Camellia Bees share with you a step-by-step guide on how to make a beautiful dahlia paper flower. Easy way to make a realistic Dahlia paper flower. DIY step by step tutorial Dahlia paper flower making. Take it easy to make!
Let’s see how to make these easy crepe Dahlia paper flowers with specific image and tutorial handmade videos below.

2.1. Step 01: Template of Dahlia paper flower

how-to-make-dahlia-paper-flower-diy-tutorial-step-by-step-1

how-to-make-dahlia-paper-flower-diy-tutorial-step-by-step-2

First create the petal template, detailed leaves as shown above, then you just cut to those dimensions to save time.

2.2. Step 02: Petals of Dahlia paper flower

how-to-make-dahlia-paper-flower-diy-tutorial-step-by-step-3

Cut a light pink crepe paper in the size of 1 inch * 2 1/4 inch to create petal shape and paste it into the foam pistil of Dahlia paper flower.

how-to-make-dahlia-paper-flower-diy-tutorial-step-by-step-4

Do the same with the 2nd layer.

Next is to create the petals with the following dimensions:

  • 1/2 inch * 1 1/4 inch
  • 1/2 inch * 1 1/2 inch
  • 3/4 inch * 2 inch
  • 1inch * 2 1/2 inch
  • 1 inch * 3 inches

how-to-make-dahlia-paper-flower-diy-tutorial-step-by-step-5

Pasting each petal of Dahlia paper flower in turn, the small size of the inner layer, the large size of the outer layer.

how-to-make-dahlia-paper-flower-diy-tutorial-step-by-step-6

Cut green crepe paper with size 3cm * 6cm to make sepals then apply glue to the finished main flower.

2.3. Step 3: Shape petals of Dahlia paper flower.

Using your fingers, carefully shape each petal to give it a more natural look.
You can also use scissors to trim any uneven edges.

2.4. Step 4: Attach stem of the Dahlia paper flower.

Finally, take your green floral tape and wrap it around the base of the flower, covering the wire stem completely. Continue wrapping the tape down the length of the stem until you reach the end.
Congratulations!
You’ve just made a beautiful Dahlia paper flower. This is a fun and easy craft that you can do with your friends and family. Try making different colors and sizes to create a stunning bouquet.

To follow more details to step by step to make Dahlia paper flower. Please click and watch the video below. Hopefully, with the above easy instructions, you can complete a beautiful paper flower to decorate or make a gift for your friends or relatives. Let’s try it !!!!

3. Creative ways to use your Dahlia paper flower

Now that you know how to make a Dahlia paper flower, let’s explore some creative ways to use them:

  • Create a bouquet of dahlia paper flowers to brighten up any room in your home
  • Add a single flower to a wrapped gift for a unique touch
  • Use multiple flowers to decorate a party or wedding venue
  • Glue a flower onto a hair clip or headband for a fun accessory
  • Make a wreath out of dahlia paper flowers to hang on your front door
  • The possibilities are endless when it comes to using dahlia paper flowers. Get creative and have fun with it!

In conclusion, making a Dahlia paper flower is a simple yet rewarding craft that anyone can do. With just a few supplies and some patience, you can create handmade flowers that will brighten up any space. Remember to experiment with different colors and shapes to make your flowers truly unique.
Happy crafting!


Posted on Leave a comment

Leather roses for the 3rd wedding anniversary

1. Meaning of leather roses on 3rd wedding anniversary

Types of handmad flowers are quite diversified, with different meaning. However, leather roses are one of the typical symbols for 3rd wedding anniversary.

1.1. Meaning of 3rd wedding anniversary

leather-roses-are-special-gifts-on-the-3rd-wedding-anniversary-2
Traditionally, people remember only the long year wedding, such as the 5th, 10th, 15th. However, the 3rd wedding anniversary brings many deep meanings:

  • The 3rd wedding anniversary is a long time to remember the 3-year journey that both of you were accompanied with each other. This is time for reviewing memories and showing love to others. The 3-year journey is not too long but enough for the couple to understand, sympathize and walk together on the path of happiness.
  • To the 3rd wedding anniversary, married life is not only beautiful with a romantic story, but also there are some challenges. You face problems related to finance, children, … which affect your life. There will certainly be arguments, quarrels, anger, but most importantly, both of them try to come up with the right solution. Only big enough love can go through these difficulties. And that’s really respectable and worth marking life’s milestones.

1.2. Meaning of leather roses on the 3rd wedding anniversary

So why is leather a symbol of the 3rd wedding anniversary? This is definitely a question that many people ask. Traditionally, leather was an extremely strong material and was used as a protective material. Leather is as a reminder of what the couple has gone through to maintain lasting happiness to this day. Thus, the 3 years of the wedding day becomes the skin anniversary.
On this day, a leather rose is a meaningful and valuable gift to give to your other half. Leather history that your marriage has become a source of protection & security. While roses are symbolic for passion, true love, romance, desire & the ultimate ‘I Love You’ statement.
To make leather roses, Camellia Bees combines the flexibility and firmness of the skin and the brilliance and beauty of the flower. Therefore, it brings a deep meaning of the hope of a romantic, passionate and lasting love, sticking together forever in the future.

2. Characteristics of leather roses for 3rd wedding anniversary in Camellia Bees

At Camellia Bees, leather roses are meticulously and carefully made by skilled craftsmen, to produce the most perfect works.

  • Size: Overally, the flower’s height is 30 cm. Bloom is 6 cm high & 9 cm in diameter Thick wired stem is 24 cm in length
  • Material: Leather
  • Color: 5 colors including: red, pink, yellow, blue, burgundy.
  • Detail: The handmade, genuine leather roses are the ideal present for the third wedding anniversary. The most exquisite keepsake for your third wedding anniversary has been meticulously handcrafted using each flower, which has been delicately hand cut & assembled. The stunning green leaves that are linked to each bloom are essential for producing the perfect roses. As a result, the fire gains greater realism and character. Flowers for immediate delivery: Leather Rose Gift includes a Kraft Gift Box. This lovely small paper box demonstrates politeness, solemnity, the meaning of cherishing, and solemnity in addition to protecting the finest flowers.

3. Function of leather roses at Camellia Bees

This beautiful leather rose has been loved by many customers thanks to its diverse functions:

  • Be present on 3rd wedding anniversary: First of all, it must be mentioned as a gift for the wife on the 3rd wedding anniversary. As mentioned above, the skin is the symbol for this day, so a leather flower will be a special gift that will make the other person fall in love from the very first moment.
  • Be present for parents, friends on special days: Not only for the wife, leather roses are also suitable for giving to relatives and friends on special days such as Mother’s Day, birthdays, or any other holiday. This commemorative gift is both meaningful and can be kept for a long time, even several years if you know how to preserve it well.
  • Decorate house: Surely when it comes to home decoration, we immediately think of fresh flowers. However, leather flowers are also a new choice. The leather roses placed neatly in a vase in the room will definitely help adorn the room, creating a bright, joyful atmosphere that is equally luxurious.

It can be said that skin roses are not only beautiful, have a deep meaning, but also have many different applications in life.

4. Some impressive samples of leather roses at Camellia Bees.

In Camella Bees, there are many leather roses with different color for meeting customer’s need. Let’s discory some attractive samples of leather roses below:

  • The red leather roses express romantic, passionate and deep feelings
leather-roses-are-special-gifts-on-the-3rd-wedding-anniversary-3
Red leather flower
  • The blue leather roses symbolizes mystery and originality
leather-roses-are-special-gifts-on-the-3rd-wedding-anniversary-4
Blue leather flower
  • The yellow leather roses represents joy, cheerfulness, is a symbol of friendship
leather-roses-are-special-gifts-on-the-3rd-wedding-anniversary-5
Yellow leather flower
  • The pink leather roses to express gratitude, congratulations to the recipient
leather-roses-are-special-gifts-on-the-3rd-wedding-anniversary-6
Pink leather flower
  • The burgundy leather roses represent passionate and passionate love
leather-roses-are-special-gifts-on-the-3rd-wedding-anniversary-7
Bungary leather flower

The leather roses are a pretty novel gift for anyone, on any special occasion, not just the 3rd wedding anniversary. Camellia Bees wishes you happy moments with your loved one!

Posted on Leave a comment

How to choose wedding anniversary flowers?

Choosing the right wedding anniversary flowers for your partner is essential to make your spouse feel loved and appreciated. In this article, we will guide you on how to choose the best flowers for your wedding anniversary.

Meaning of wedding anniversary flowers

Flowers have long been a symbol of love, affection, and appreciation, making them an essential element in wedding anniversary celebrations. They not only add a touch of elegance and beauty to the occasion but also convey heartfelt emotions and sentiments. In this article, we will explore the various roles of wedding anniversary flowers in making wedding anniversary days truly special and memorable.

Wedding anniversary flowers bring special meaning

Each wedding anniversary is associated with a specific flower, symbolizing the unique qualities and milestones of the couple’s journey together. For instance, the first anniversary is represented by carnations, symbolizing the ties of lasting vows and joy for the years to come. Roses, the quintessential symbol of love and passion, represent the 15th anniversary, while the 50th anniversary is marked by the elegance and beauty of violets. On the other hand, paper handmade flowers are popular for the 1st wedding anniversary. Incorporating these traditional flowers into the celebration adds a touch of sentimentality and honors the couple’s enduring love.

Wedding anniversary flowers decorate celebration

how-to-choose-wedding-anniversary-flowers-1

Flowers play a significant role in setting the ambiance for a wedding anniversary celebration.
From table centerpieces to garlands and bouquets, floral arrangements can transform any venue into a romantic and enchanting space. The choice of flowers, colors, and styles can be tailored to reflect the couple’s personality, preferences, and the theme of the celebration.
Moreover, wedding anniversary flowers can also be used to create stunning backdrops for photographs, ensuring that the memories of the special day are beautifully captured and cherished for years to come.

Wedding anniversary flowers are love gifts

Presenting the couple with a floral gift or keepsake is a thoughtful and meaningful gesture that commemorates their wedding anniversary. Gifting these flowers on your anniversary is a beautiful way to express your love and commitment to your partner, while also honoring the years you’ve spent together.
A bouquet featuring the anniversary’s symbolic flower, a potted plant, or a beautifully crafted floral arrangement can serve as a lasting reminder of the love and commitment they share.
Additionally, floral-inspired jewelry, artwork, or home decor items can make for unique and treasured anniversary gifts.

how-to-choose-wedding-anniversary-flowers

Types of wedding anniversary flowers

Fresh wedding anniversary flowers categorized by meaning of year

  • On 5th Anniversary: Daisies are the chosen flower for the 5th wedding anniversary, symbolizing innocence, purity, and true love. The daisy’s simple yet elegant beauty represents the joy and happiness shared during the first five years of marriage. Gifting daisies on this anniversary is a reminder of the pure and unwavering love that has blossomed between you and your partner.
  • On 10th Anniversary: Daffodils, with their bright and cheerful appearance, symbolize new beginnings, hope, and happiness. As the flower for the 10th wedding anniversary, they represent the renewal and growth experienced in a decade of marriage. Gifting daffodils on this milestone is a celebration of the journey you’ve shared and the bright future that lies ahead.

Handmade wedding anniversary flowers categorized by material

As wedding anniversaries come and go, the tradition of gifting flowers remains a timeless gesture of love and appreciation. However, why not elevate this classic gift by opting for handmade flowers, meticulously crafted from a variety of materials? These unique creations not only symbolize the enduring love between a couple but also serve as a lasting keepsake. Explore our curated list of handmade wedding anniversary flowers, categorized by the materials used to create them.

Paper wedding anniversary flowers

Delicately hand-folded and intricately designed, paper flowers offer a whimsical and eco-friendly alternative to fresh blooms. Available in a myriad of colors and styles, these exquisite creations can be tailored to suit any anniversary theme or personal preference.

how-to-choose-wedding-anniversary-flowers-3

Fabric wedding anniversary flowers

Soft, elegant, and versatile, fabric flowers are a beautiful way to celebrate a wedding anniversary. Crafted from materials such as silk, satin, or lace, these stunning blooms can be customized to match the couple’s wedding colors or their favorite hues, making them truly personal wedding anniversary flowers.

Metal wedding anniversary flowers

For a more modern and sophisticated touch, consider gifting metal flowers, skillfully crafted from materials like copper, brass, or stainless steel. These durable and eye-catching creations make a bold statement and can be displayed indoors or outdoors, serving as a constant reminder of the couple’s enduring love.

Wood wedding anniversary flowers

For a fifth anniversary, represented by wood, a bouquet featuring wooden accents or rustic-looking blooms like sunflowers is lovely.
As the years go by, a wooden flower remains a beautiful and enduring symbol of the love and commitment that has grown and flourished between a couple. Whether it’s a first anniversary or a milestone celebration, a wooden flower is a perfect way to honor the journey that has been shared and the memories that have been created along the way.

Available in a variety of styles, colors, and designs, wooden flowers can be customized to suit the preferences and tastes of the couple. From elegant roses to vibrant sunflowers, these handcrafted creations are a true testament to the artistry and skill of the artisans who make them. Each wooden flower is carefully crafted to capture the essence and beauty of its natural counterpart, making it a stunning addition to any home or office decor.
When it comes to selecting the perfect wooden flower for a wedding anniversary, consider the couple’s favorite flowers, their wedding colors, or even their individual personalities. A wooden flower can be a meaningful and personal gift that reflects the unique love story that has unfolded over the years.

Factors affect choosing wedding anniversary flowers

how-to-choose-wedding-anniversary-flowers

Choosing the right flowers for a wedding anniversary can be a daunting task, as there are numerous factors to consider. From the couple’s preferences to the symbolism of different flowers, it’s essential to take the time to select the perfect blooms that will make the occasion even more special. Here are some factors to keep in mind when selecting wedding anniversary flowers:

The couple’s preferences about wedding anniversary flowers

The most important factor to consider is the couple’s personal preferences. If you know their favorite flowers or colors, it’s a good idea to incorporate those into the arrangement. If you’re unsure, you can always ask for their input or choose a classic option like roses, which are universally loved.

Symbolism of wedding anniversary flowers

Understanding the symbolism behind different flowers can help you choose a meaningful and thoughtful arrangement. For example, roses symbolize love and passion, making them a popular choice for anniversaries. Lilies represent devotion, while daisies symbolize innocence and purity. Research the meanings of various flowers to find the perfect match for the couple’s relationship and the milestone they’re celebrating.

Wedding anniversary flowers for anniversary milestones

Certain flowers are associated with specific anniversary milestones. For example:

  • 1st wedding anniversary: carnations are traditionally given on the first anniversary, symbolizing the ties of lasting commitment.
  • 3rd wedding anniversary: in this milestone, sunflower is the best choice which shows fidelity, loyalty, and perfectionism.
  • 25th wedding anniversary: Irises are associated with the 25th anniversary, representing the promise of a happy future.

By choosing flowers that correspond to the couple’s milestone, you can add an extra layer of significance to the gift.


Posted on Leave a comment

The reasons why paper handmade flower are popular

Paper handmade flower is popular and familiar for many people in modern world. It is used for many different purposes from decoration, relax, to gift. Today, Camellia Bees gives more information about paper handmade flower. 

Meaning of paper handmade flower

The same as real flowers, paper handmade flower has many different meaning. It depends on factors, including color, material and occasion.

Meaning of paper handmade flower based on colors

Paper handmade flowers can be made in any color. With real flowers, you’re limited to the colors that nature provides. With paper handmade flowers, however, you can choose any color under the sun! Whether you want bright and bold hues or soft pastels, it’s easy to create a custom color scheme that matches your style. The same as fresh flowers, paper handmade flower has also color with different meaning:

  • Red paper handmade flower: Red roses symbolize all the things that make up a great love story: Passion, longing, true love and romance. No wonder the red rose has become a classic Valentine’s Day flower! In bridal bouquets or other wedding arrangements, red roses can symbolize newlywed happiness and mutual respect and affection between the couple.
  • Pink paper handmade flower: These flowers are a symbol of elegance, sophistication, sweetness and femininity. Pink roses are suitable for royalty. Furthermore, pale pink roses are often associated with grace, tenderness, cheerfulness, and happiness.
  • White paper handmade flower: White roses represent purity, youth and innocence. Young love, eternal loyalty, and new beginnings are also often associated with the meaning of white roses, making them a popular choice for weddings and romantic occasions.
  • Yellow paper handmade flower: Yellow is the color of bright sunshine, warmth, joy, and joy. The meaning of yellow roses in love is as special as its color. These are the best wishes for your loved ones. For Westerners, the yellow rose is a symbol of power, wisdom and bright happiness.
  • Purple paper handmade flower: While the purple fresh flower is quite rare, purple rose which is made by hand is not hard to buy. In love, purple represents fidelity, iron, and eternity, so purple roses symbolize a bonded relationship that is sustainable over time. Previously, purple roses were also chosen to offer to kings. Therefore, they remind us of nostalgia, an extraordinary nobility.

the-reasons-why-paper-handmade-flower-are-popular-1

Meaning of paper handmade flower based on custom occasions

Paper handmade flower can be customized for any occasion, from weddings to birthdays to anniversaries. You can even create custom bouquets that incorporate specific themes or motifs, making them truly one-of-a-kind.

  • In the wedding anniversary: Celebrating the wedding day, choosing meaningful handmade flowers through beautiful bouquets and flower baskets, such as scarlet roses, sweet carnations, sunflowers,…. However, each year of the wedding anniversary shows a different meaning and is represented by a specific flower. Therefore, based on each person, you should choose a suitable handmade flower.
  • On birthdays: On birthdays, handmade flowers are not only congratulations, but also a special gift for relationships and friends. There are a lot of types of handmade flowers which are made from wood, wool, linen,… A handmade flower bouquet with paper is one of the most popular products because it is suitable for anyone.
  • On valentine’s day: This is a special day for couples to show their love to their partner, so a handmade paper flower bouquet craft is a gift instead of any words. On Valentine’s day, a paper rose represents burning and deep love. On the other hand, if your partner has passion for other flowers, don’t forget to prioritize his/ her preference.

It can be said that paper handmade flowers are popular for both men and women on any special occasions.

Meaning of paper handmade flower based on combined materials

Paper handmade flower can be combined with other materials such as ribbon, lace, or beads to create unique and eye-catching designs. By mixing and matching different textures and materials, you can create a bouquet that’s both beautiful and interesting. Overall, paper handmade flowers offer endless customization options that allow you to create a truly unique and personalized bouquet. Whether you’re looking for a specific color scheme, theme, or message, paper handmade flowers can be tailored to your preferences and needs.

Advantages of paper handmade flower

Many people choose paper handmade flower than fresh flower because its appearance as well as other benefits:

Paper handmade flower is friendly- environment

the-reasons-why-paper-handmade-flower-are-popular-2

One of the most advantage from paper handmade flower is friendly- environment which contributes to protect environment.

  • They’re made from recycled materials: Paper handmade flowers are often crafted from recycled materials such as old newspapers, magazines, and cardboard boxes. This means that they’re not only beautiful but also sustainable. By using recycled materials, you’re reducing waste and helping the environment.
  • They’re biodegradable: When you’re done with your paper handmade flowers, you can simply throw them away without worrying about harming the environment. Unlike plastic flowers, which take hundreds of years to decompose, paper flowers will break down naturally over time.
  • They reduce carbon emissions: Transporting fresh flowers requires a lot of energy, which contributes to carbon emissions. By choosing paper handmade flowers instead, you’re reducing your carbon footprint and doing your part to help combat climate change.

Paper handmade flowers don’t require water.

the-reasons-why-paper-handmade-flower-are-popular-3
Unlike real flowers, paper handmade flowers don’t need water to survive. This makes them ideal for those who want to enjoy the beauty of flowers without having to worry about watering them. Plus, you won’t have to deal with any messy spills or leaks! With a busy person, this is the perfect choice to enjoy beauty without wasting time.

Paper handmade flowers last longer than real flowers.

Real flowers may look stunning, but they don’t last very long. Paper handmade flowers, on the other hand, can last for years if properly cared for. This means that you can enjoy their beauty for much longer, making them a more practical choice in the long run. With handmade paper flowers, if you keep them in good condition, they can last some months, even some years.

How to make paper handmade flower

If you don’t want to buy paper handmade flowers, you can spend time making them by yourself. Creating paper handmade flowers is an enjoyable, eco-friendly, and cost-effective activity that adds a personal touch to any event or home decor. With the plethora of options available, from paper type to flower design and technique, you can easily craft beautiful blooms that suit your taste and style through tutorial videos. By experimenting with different colors, textures, and patterns, you’ll be able to create stunning arrangements that will leave your friends and family impressed with your artistic skills. So, gather your materials, get inspired, and start crafting your very own gorgeous, long-lasting paper flowers today! Don’t forget to share your creations on social media using the hashtag #paperflowers to connect with fellow paper flower enthusiasts and gather even more inspiration.

In conclusion, Camellia Bees provides bella beauty and beast rose for customer who loves art and always enjoy the most natural beauty.